
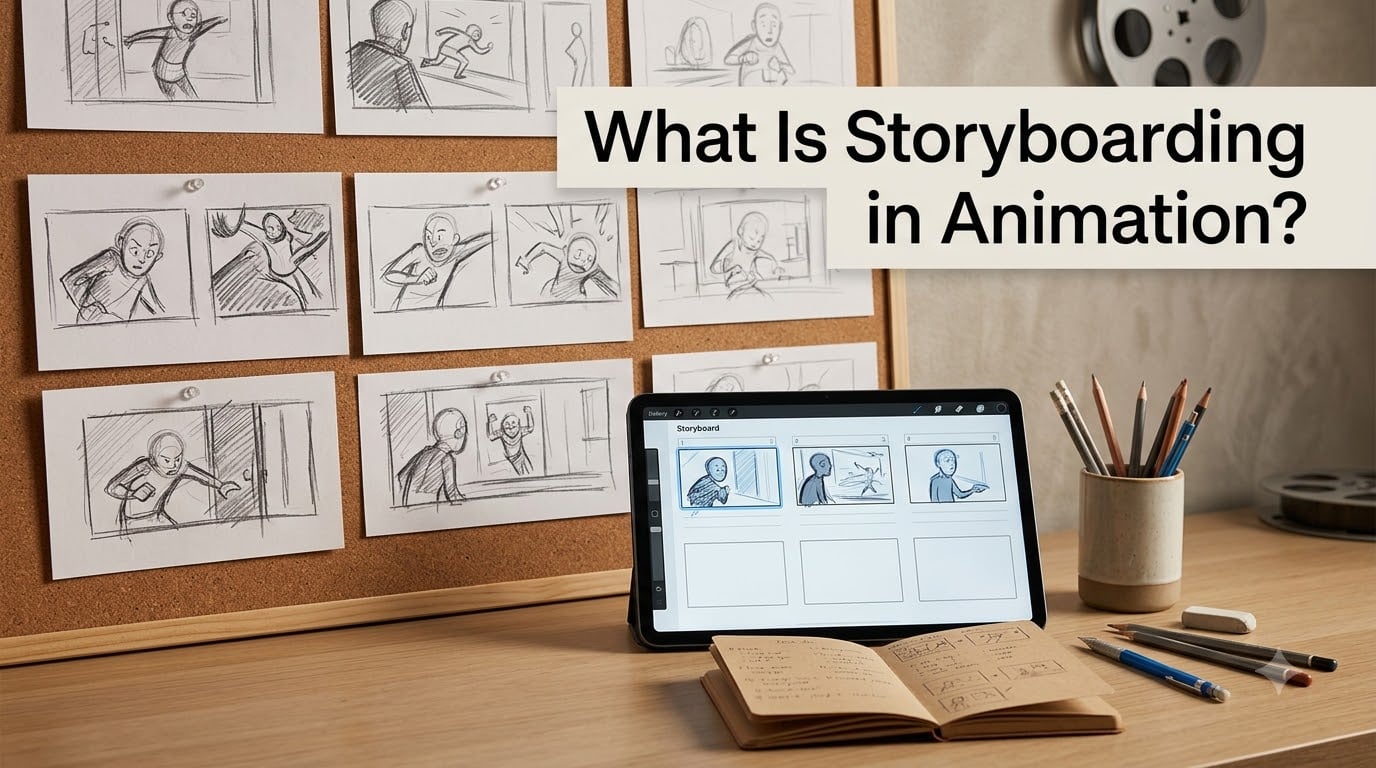
If you have ever wondered how an animator turns a written script into the moving pictures you see on screen, the answer almost always starts with storyboarding. Storyboarding in animation is the pre-production process of sketching a visual blueprint for your film, scene by scene, before a single frame is fully animated.
I have spent the last few months breaking down how animation studios of every size approach this step, and the results are clear: storyboards are the backbone of every successful animation project. In this guide, I will walk you through what storyboarding is, why it matters, the step-by-step process, the tools professionals use, and the mistakes most beginners make.
Table of Contents
- What Is Storyboarding in Animation?
- Brief History of Storyboarding in Animation
- What Does a Storyboard Panel Include?
- Why Storyboarding Is Essential for Animation Projects
- The Storyboarding Process: Step by Step
- Storyboard Examples From Popular Animations
- Best Tools and Software for Animation Storyboarding
- Storyboard vs Animatic: What’s the Difference?
- Common Storyboarding Mistakes Beginners Make
- Frequently Asked Questions About Storyboarding in Animation
- Final Thoughts on Storyboarding in Animation
What Is Storyboarding in Animation?
Storyboarding in animation is the practice of creating sequential thumbnail sketches that plan every shot, action, and camera angle of an animated film before production begins. Each sketch sits inside a panel that represents one shot, complete with notes on dialogue, character movement, and how the camera should behave.
Think of it as a comic book version of your animation. Instead of telling the story in finished illustrations, you tell it in rough sketches that map out timing, composition, and pacing. The storyboard becomes a shared reference that directors, animators, editors, and producers can all read at a glance.
For short films especially, storyboarding is what separates a project that gets finished from one that stalls halfway through. Without a visual plan, animators waste hours reworking scenes, fixing continuity errors, and second-guessing camera choices.
Brief History of Storyboarding in Animation
The storyboarding technique was popularized in the early 1930s at Walt Disney Studios. A story artist named Webb Smith is credited with pinning rough scene sketches to a bulletin board in sequence so the team could visualize the flow of a film before animating it.
Before that, animators worked from written scene descriptions and had to imagine every cut and transition in their heads. Smith’s simple idea of using sequential visual panels transformed the entire animation pipeline.
Disney’s Snow White and the Seven Dwarfs (1937) was one of the first feature animations built on a formal storyboard. By the time Pixar released Toy Story in 1995, storyboards had become standard across every major studio, and they remain so today.
What Does a Storyboard Panel Include?
Every panel in a storyboard carries more than just a sketch. A standard animation storyboard panel includes the frame, scene number, action notes, dialogue notes, and camera directions.
Here is what you will find inside each panel:
- Panel frame: A rough drawing showing the shot’s composition, character poses, and key action.
- Scene and shot number: Used to track the order and location in the script (for example, Scene 12, Shot 3B).
- Action notes: Short written descriptions of what happens in the shot (a character walks to the window, the door creaks open).
- Dialogue notes: The spoken line, sound effects, or silence indicators placed beneath the panel.
- Camera directions: Arrows or text indicating pan, zoom, dolly, tilt, or cut instructions.
- Timing notes: Estimated length of the shot in seconds, often shown as “3 sec” or “1.5 sec”.
Together these elements give your entire crew enough information to understand a shot without watching finished animation. That clarity is what makes storyboarding in animation so powerful.
Why Storyboarding Is Essential for Animation Projects
Storyboarding is not optional if you want a smooth production. It is the cheapest insurance you can buy against expensive reworks later in the pipeline. Animators who skip storyboards almost always run into the same problems: confusing cuts, awkward pacing, and characters moving in ways that break the story.
Here is why storyboarding matters for animation projects of any size:
- Problem solving early: You can spot weak story beats, confusing transitions, or blocking issues before anyone spends hours animating them.
- Better pacing: Adjusting the timing of a scene in a storyboard takes minutes. Adjusting it in finished animation takes days.
- Clear communication: Every crew member reads the same visual plan, so directors, animators, and editors stay aligned.
- Client and collaborator buy-in: A polished storyboard is the easiest way to pitch an idea and lock approval before production costs begin.
- Cost savings: One hour of rework on a storyboard replaces dozens of hours of expensive animation revisions.
Working professionals agree: even short projects benefit from at least a rough storyboard. On Reddit’s r/animation and r/IndieAnimation communities, most finished projects come from teams who planned their scenes visually first.
The Storyboarding Process: Step by Step
If you have never made a storyboard before, the process is more approachable than you might think. Follow these seven steps and you will have a working storyboard for your animation.
Step 1: Read your script carefully. Break it down into scenes and identify the most important visual moments. Highlight any action, transitions, or camera moves the script calls out.
Step 2: Create thumbnail sketches. Draw very small, rough versions of each shot first. Thumbnails let you test composition, framing, and shot flow without committing to detail.
Step 3: Plan your panels. Decide how many panels each scene needs. A fast action scene might need 20 panels. A quiet dialogue scene might need 5.
Step 4: Sketch each panel. Draw your final panels at a consistent size on paper or in software. Keep the art loose; the goal is clarity, not polish.
Step 5: Add action and dialogue notes. Write down what happens in each shot and any dialogue, sound effects, or silence. Place these notes directly under each panel.
Step 6: Mark camera directions. Add arrows, X marks, or short text to show pans, zooms, cuts, or camera movement. Use industry-standard shorthand when possible.
Step 7: Review and revise. Read through your storyboard like a viewer, not the creator. Ask yourself: does the story flow? Are the cuts clear? Is the pacing right?
Once these seven steps are done, you have a complete storyboard ready for animatic production or handoff to your animation team.
Storyboard Examples From Popular Animations
The best way to understand storyboarding is to see it next to finished animation. Pixar has published side-by-side comparisons of storyboards and final scenes from The Incredibles, Up, and Inside Out.
In these comparisons, you can see how a single rough panel becomes a fully lit, fully animated shot. The blocking stays almost identical: same camera angle, same character placement, same timing. The storyboard is the seed, the finished animation is the tree.
Disney’s Frozen is another classic example. The filmmakers released original storyboards showing how the “Let It Go” sequence was planned in sequential panels before any animation began. You can almost hear the music reading the panels.
These real examples show why storyboarding in animation is not a loose planning step. It is a precise blueprint that the entire production builds on.
Best Tools and Software for Animation Storyboarding
You can storyboard with a pencil and notebook, but most professional animators use digital tools. The two most common options are Toon Boom Storyboard Pro and the free, open-source Storyboarder from Wonder Unit.
Toon Boom Storyboard Pro is the industry standard. Studios like Disney, Pixar, and Netflix use it because it integrates shot management, animatic creation, camera moves, and team collaboration in one app.
Storyboarder is the free alternative I recommend for beginners and solo animators. It is built by the same team behind some major film projects, and it handles sketching, panel layout, and basic animatic export without a subscription.
Adobe also offers storyboarding features inside its Creative Cloud apps, including Photoshop templates and Adobe Express boards. These are useful if you already work inside the Adobe ecosystem.
If you are just starting out, pick Storyboarder or a simple paper template. The tool matters far less than the discipline of drawing your panels before animating.
Storyboard vs Animatic: What’s the Difference?
A storyboard is a static set of sketches. An animatic is what happens when you add timing, camera moves, scratch dialogue, and temporary sound to those sketches and play them back as a rough video.
In other words, the storyboard is the blueprint. The animatic is the first moving test of that blueprint. Most animation studios create animatics after storyboards so they can feel the pacing before committing to full animation.
For short films, animatics are especially valuable because they let you test your timing against music and dialogue before production costs stack up.
Common Storyboarding Mistakes Beginners Make
I have watched dozens of first-time storyboard artists fall into the same traps. Avoiding these mistakes will save you weeks of frustration.
- Trying to draw finished art too early. Storyboards are supposed to be loose. If your panels are polished, you are slowing yourself down.
- Skipping camera direction notes. A panel without camera notes leaves the animator guessing how the shot should feel.
- Forgetting timing. Without estimated shot length, your pacing will collapse in the animatic stage.
- Ignoring transitions between panels. Cuts and dissolves should be planned, not improvised in editing.
- Working without a clear shot list. Jumping straight into panels without listing shots first leads to missing coverage.
Speed matters too. Storyboard artists in production environments need to produce dozens of panels a day. If you find yourself spending an hour per panel, simplify your sketches until the story is clear, then move on.
Frequently Asked Questions About Storyboarding in Animation
What is a storyboarding example?
A storyboarding example is a rough sketch showing a single shot from an animation, paired with notes for dialogue, action, and camera movement. Pixar and Disney have published side-by-side storyboard-to-final-frame comparisons from films like Toy Story, Up, and Frozen that show how a sketch becomes a finished shot.
Is storyboarding necessary for animation?
Yes, storyboarding is necessary for animation. It lets you plan shots, fix pacing, and solve visual problems before production begins, saving time and money. Even short animation projects run more smoothly when a rough storyboard is in place.
How much do animation storyboards get paid?
Animation storyboard artists in the United States typically earn between 55k and 120k per year depending on experience, studio, and project type. Freelance storyboard artists often charge by the panel or by the day, with rates ranging from 200 to 800 per day for short film and commercial work.
How to make a storyboard for an animation?
To make a storyboard for an animation, read your script, sketch small thumbnails for each shot, refine your panels at a consistent size, then add action notes, dialogue notes, camera directions, and timing marks under each panel. Most animators use paper, Storyboarder, or Toon Boom Storyboard Pro for this process.
Final Thoughts on Storyboarding in Animation
Storyboarding in animation is the single step that turns a script into a watchable film. It is where the timing, framing, and visual rhythm of your project are decided before any expensive production begins.
If you are starting your next short film, take an afternoon to rough out your scenes on paper or in Storyboarder before you touch your animation software. The few hours you invest in storyboarding will save you dozens of hours in production, and your finished film will tell a tighter, clearer story because of it.
1 thought on “What Is Storyboarding in Animation? Complete Guide (September 2026)”