
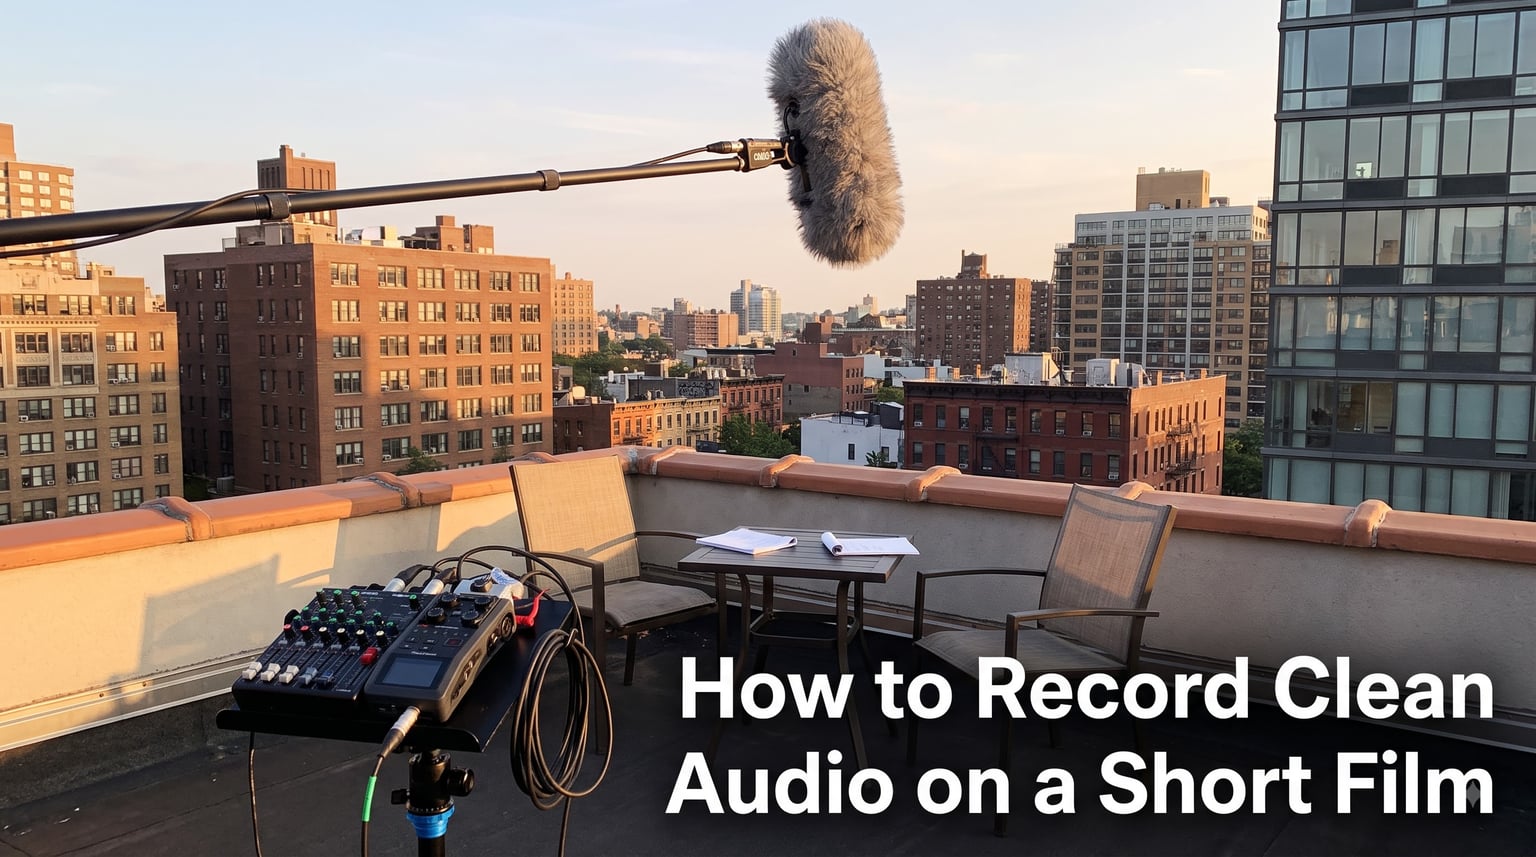
If you want your short film to feel professional, learning how to record clean audio on a short film is non-negotiable. Audiences will tolerate shaky footage and imperfect lighting, but bad audio makes them hit stop within seconds. I learned this the hard way on my first student short, where my beautiful golden-hour shots were completely overshadowed by the hum of an air conditioner I never noticed on set.
This guide walks through the exact workflow I now use on every short film shoot. We’ll cover microphone selection, the 3-to-1 rule, audio levels, monitoring, wildtracks, outdoor wind protection, and the post-production sync step. Whether you’re a solo filmmaker with a smartphone or running a small crew with a budget recorder, the principles are the same: get the mic close, monitor constantly, and plan your sound before you call action.
Table of Contents
- Why Clean Audio Makes or Breaks a Short Film?
- Pre-Production: Plan Your Audio Before You Shoot
- Choosing the Right Microphone: Shotgun, Lavalier, and Boom
- Microphone Placement Techniques and the 3-to-1 Rule
- Setting Audio Levels and Monitoring on Set
- Outdoor Recording: Wind Protection and Location Audio
- Capturing Wildtracks and Room Tone for Post-Production
- Syncing Audio in Post-Production
- Common Mistakes to Avoid When Recording Short Film Audio
- On-Set Audio Checklist for Short Film Crews
- Frequently Asked Questions
- What is the 3-to-1 rule in recording?
- How do I record clean audio on a short film with no budget?
- How do you get clear voice while recording?
- Can you record clean audio on a short film using an iPhone?
- What decibel level should dialogue be recorded at?
- Why is monitoring audio with headphones so important?
- Final Thoughts on Recording Clean Audio for Your Short Film
Why Clean Audio Makes or Breaks a Short Film?
Clean audio is the half of your film most viewers process without realizing it. When dialogue is crisp and ambient sound feels natural, the audience settles into the story. When audio is muddy, peaky, or interrupted by background noise, they feel the friction immediately. Industry research has shown audiences will abandon a video with poor audio far faster than one with poor video.
For short films specifically, you have a smaller window to win over your audience. Festival programmers and online viewers decide within the first thirty seconds whether to keep watching. I have watched test screenings where a technically beautiful short lost half its viewers because the location dialogue was buried under HVAC noise and camera handling. The fix wasn’t more expensive gear; it was closer mic placement and consistent monitoring.
Pre-Production: Plan Your Audio Before You Shoot
Audio planning starts before you ever load a camera into a car. Most short film audio disasters are pre-production failures that show up on set. The single biggest factor in clean dialogue is the location itself, and you control that choice.
When scouting locations, I now bring a small portable recorder and a pair of headphones. I record thirty seconds of audio in every room I consider, then listen back later with my director’s ear. Listen for refrigerators, traffic, fluorescent hum, neighbors, and air handlers. The pretty loft with the brick wall might be unusable at 6 PM when the bar downstairs turns on its speakers.
Build a short film audio checklist during pre-production:
Record 30-60 seconds of room tone at every location
Identify the noisiest time of day and avoid it
Confirm you have power for charging recorders and batteries
Decide which scenes need a boom operator, a lavalier, or both
Plan your wildtrack capture for every interior and exterior location
Reserve time at the end of the shoot for room tone and ambience
This kind of planning costs you an hour in pre-production but saves a full day of frustrated ADR sessions later.
Choosing the Right Microphone: Shotgun, Lavalier, and Boom
There is no single best microphone for short films. Each type solves a different problem, and most professional dialogue scenes combine two at once. Here’s how I think about the three core options.
Shotgun microphones are highly directional. They reject sound from the sides and pick up mainly what is in front of them, which makes them ideal for boom work and camera-top mounting. A good shotgun pointed at a speaker from a few feet away will deliver cleaner dialogue than an omnidirectional mic at the same distance. The trade-off is that they still pick up everything in their rejection pattern, so they don’t isolate completely.
Lavalier microphones clip onto clothing and sit close to the actor’s mouth. Because they are physically near the source, they deliver a strong signal-to-noise ratio even in noisy environments. Lavs are my go-to for solo filmmakers because they let me move the camera freely without losing audio quality. The downside is clothing rustle, which I solve with proper placement and tape.
Boom microphones are essentially shotguns on a pole, held just out of frame above the actor. A boom operator can follow the actor, keep the mic pointed at the mouth, and pull it out of frame quickly between takes. For short films with dialogue scenes, a boom is the gold standard because it tracks movement and delivers the most natural sound.
For most short film shoots, my ideal kit is one boom mic plus two wireless lavaliers. That gives you options: boom the master shot, lav the close-ups, and double-system record everything for safety.
Microphone Placement Techniques and the 3-to-1 Rule
Microphone placement matters more than microphone model. A cheap mic placed well will outperform an expensive mic placed poorly. The goal is to get the diaphragm as close to the actor’s mouth as practical while staying out of frame.
For boom work, I aim to keep the mic 12 to 18 inches above the actor’s mouth and pointed down at them. Any farther and you start picking up room reflections and losing presence. For lavaliers, place them on the chest about six to eight inches below the chin, with the capsule pointing up toward the mouth. Avoid placing them under clothing or against the skin where sweat and rustle will ruin the take.
Now, the 3-to-1 rule. The 3-to-1 rule states that when using multiple microphones on the same sound source, each microphone should be at least three times farther from the other microphones than it is from the source. In practice, if your boom mic is 12 inches from the actor’s mouth, your second mic (say a wide-room lav or a backup recorder) must be at least 36 inches away from the boom. This prevents phase cancellation, which is the comb-filtering artifact you hear when identical sounds arrive at two microphones at slightly different times.
Phase cancellation is the most common cause of hollow, weird-sounding dialogue that filmmakers can’t explain. If you have two mics picking up the same actor and you mix them, but the result sounds worse than either one alone, that’s the 3-to-1 rule being violated. Spacing them properly solves it instantly.
Setting Audio Levels and Monitoring on Set
Levels are where most beginners lose good audio. The instinct is to set the gain so the meter sits in the green, but the safe range for dialogue is much lower than that. I aim for peaks around -12 dBFS on the recorder’s meter, with average speech sitting around -20 dBFS. This gives you 12 dB of headroom for unexpected loud moments like a door slam, a laugh, or an actor raising their voice.
If you record too hot, you will clip the input. Clipped audio is permanently distorted and cannot be fixed in post. Recording a little quieter always beats recording too loud, because you can turn clean quiet audio up later without penalty. You cannot repair clipped audio.
Monitoring with headphones is not optional. Closed-back headphones let you hear what the microphone is actually picking up. Every short film I have worked on where the audio failed, the crew was not wearing headphones during the take. You cannot evaluate your sound by listening to the room. You must listen to what the mic hears, and that means plugging in.
Outdoor Recording: Wind Protection and Location Audio
Wind is the enemy of outdoor dialogue. Even a light breeze pushes against a microphone diaphragm and creates low-frequency rumble that ruins a take. The fix is wind protection, layered from lightest to heaviest.
A foam windscreen is the basic shield that fits over most shotgun and lavalier mics. It knocks down light breeze and handling noise. For real wind, you need a fuzzy windsock, often called a “dead cat” or “windjammer.” These look ridiculous but they work. For extreme conditions, combine the foam with the dead cat for double protection.
Beyond wind, outdoor locations bring traffic, planes, dogs, and crowds. You can’t control these, but you can choose when and where you shoot. I have delayed scenes by two hours to wait for a construction crew to finish, and that single decision saved a scene.
When you can’t avoid noise, lean harder on lavalier microphones. Because they sit so close to the actor’s mouth, they reject more distant sounds than a boom can. A shotgun at four feet in a windy park will pick up rustling leaves; a lav at six inches from the actor’s mouth will mostly hear the actor. Use that physics to your advantage.
Capturing Wildtracks and Room Tone for Post-Production
Wildtracks are continuous recordings of ambient sound at a location, captured with no performance happening. Room tone is a specific type of wildtrack: 60 to 90 seconds of silence in an interior space. Both are essential tools that most beginner filmmakers forget to capture.
Your dialogue recording will have gaps. Maybe the actor pauses for breath. Maybe the scene cuts away at a tense moment. Without room tone, those gaps will sound like dead air, because the audience’s brain remembers the ambient sound from the previous take. With room tone, your editor can lay it under the gaps and the scene sounds continuous.
I capture room tone at every interior location, even if the script doesn’t seem to need it. I record 90 seconds with the room empty, no crew, no talking, no movement. Then I label the file clearly: “INT – KITCHEN – ROOM TONE – TAKE 1.” In post, I drop that file under every kitchen scene and any quiet moment. The result is dialogue that sounds like it belongs in the space.
For exteriors, I capture wildtracks of the specific environment: street traffic, park birds, distant ocean. These let me extend scenes, cover edits, and create a believable soundscape even when the original take was unusable.
Syncing Audio in Post-Production
When you record audio separately from your camera, you have to sync them in post. This is called dual-system recording, and it’s standard practice on every professional short film. The two most reliable sync methods are the slate and timecode.
A traditional clapper slate creates a visual spike on the video and an audio spike on the recorder at the same moment. In your editing software, line up the spike from the slate with the visual spike from the clapper sticks closing. Done. The whole scene is now in sync, and every other audio file from that continuous recorder take is also in sync because you recorded it all in one session.
If you don’t have a slate, use your hands. Have the actor clap once loudly at the start of each take. The visual clap on the video and the audio spike on the recorder give you the same sync reference. It looks less professional but it works exactly the same.
Modern sync tools like PluralEyes can analyze waveforms and align them automatically, but I still slate every take as a backup. Automatic sync fails occasionally, and you do not want to discover that on the day your film is due.
Common Mistakes to Avoid When Recording Short Film Audio
After a decade of short film production, I see the same audio mistakes on every shoot. Here are the ones to watch for, and how to fix them.
Relying on camera microphones. Built-in camera mics exist for reference only. They pick up handling noise, lens autofocus, and the operator’s breathing. Never use them as your primary dialogue audio. Mount a real microphone and record to an external recorder or through a mixer.
Not monitoring audio during the take. If your sound operator is scrolling their phone, they will miss the buzzing that ruined your best performance. Headphones on, eyes on meters, every take.
Setting levels too hot. Peaks above -6 dBFS are dangerous. Distorted audio cannot be repaired in post. Aim for -12 dBFS peaks and leave headroom.
Forgetting to capture room tone. Without room tone, your quiet scenes will sound hollow. Spend two minutes at each location capturing 90 seconds of silence.
Ignoring the 3-to-1 rule. Two microphones too close together create phase cancellation. Space them properly or use only one mic per take.
Skipping wind protection outdoors. Foam at minimum, dead cat in real wind. There is no editing fix for wind rumble.
On-Set Audio Checklist for Short Film Crews
Print this out and tape it to your sound bag. Run through it at the start of every shooting day.
Recorder batteries charged, with spares
Microphone batteries or phantom power confirmed
Headphones tested, one ear cup working minimum
Windscreens and dead cats packed for outdoor scenes
XLR cables checked for damage
Lav mics fresh, with tape and mounting accessories
Memory cards formatted and ready, with backups
Slate or hand-clap method confirmed with director
Timecode synced if using it
Headroom confirmed by recording a test tone
Headphones on the operator before rolling
Room tone recorded at each new location
Wildtracks captured for every exterior
Labels written down for each take
Frequently Asked Questions
What is the 3-to-1 rule in recording?
The 3-to-1 rule states that when multiple microphones capture the same sound source, each mic should be at least three times farther from the other microphones than it is from the source. For example, if a boom mic is 12 inches from an actor’s mouth, any second microphone on that actor must sit at least 36 inches from the boom. This prevents phase cancellation, the hollow, comb-filtered sound you get when identical audio arrives at two mics at slightly different times.
How do I record clean audio on a short film with no budget?
You can record clean audio on a short film with no budget by using a single lavalier microphone placed close to the actor’s mouth, recording into a smartphone or cheap recorder, monitoring with earbuds, and capturing 90 seconds of room tone at every location. Skip the camera microphone entirely. Get the mic as close to the source as possible, set levels conservatively, and protect against wind outdoors.
How do you get clear voice while recording?
You get a clear voice while recording by placing a directional microphone within 12 inches of the speaker’s mouth, setting recording levels so peaks sit around -12 dBFS, monitoring with closed-back headphones, eliminating background noise sources like fans and refrigerators when possible, and using wind protection outdoors. Microphone placement matters more than microphone price.
Can you record clean audio on a short film using an iPhone?
Yes, you can record clean audio on a short film using an iPhone if you plug in an external microphone through the Lightning or USB-C port. The iPhone’s built-in microphone is not suitable for dialogue, but an inexpensive lavalier or shotgun mic connected to the iPhone will deliver usable results. Record with a dedicated audio app that captures uncompressed WAV files and lets you monitor input levels.
What decibel level should dialogue be recorded at?
Dialogue should be recorded with peaks around -12 dBFS on your recorder’s meter, with average speech sitting between -20 and -24 dBFS. This gives you roughly 12 dB of headroom for louder moments like laughter or door slams. Recording hotter risks clipping, which permanently distorts the audio and cannot be fixed in post-production.
Why is monitoring audio with headphones so important?
Monitoring audio with headphones is so important because the microphone hears a different sound than your ears do. Room reflections, distant noises, clothing rustle, and wind are often inaudible to you on set but get captured by the microphone. Closed-back headphones let you hear exactly what is being recorded so you can catch problems immediately and reshoot before the actors leave the set.
Final Thoughts on Recording Clean Audio for Your Short Film
Learning how to record clean audio on a short film is one of the highest-return skills you can develop as a filmmaker. The techniques are not expensive and they do not require a sound engineering degree. Get the microphone close to the actor’s mouth, set your levels with headroom, monitor every take with headphones, capture room tone at each location, and slate your takes for easy syncing.
The filmmakers whose shorts feel professional to me are not the ones with the most expensive gear. They are the ones who prepared for sound during pre-production, paid attention to levels on every take, and left the set with clean, well-labeled audio files ready to edit. Make that your standard, and your short films will sound as good as they look.