
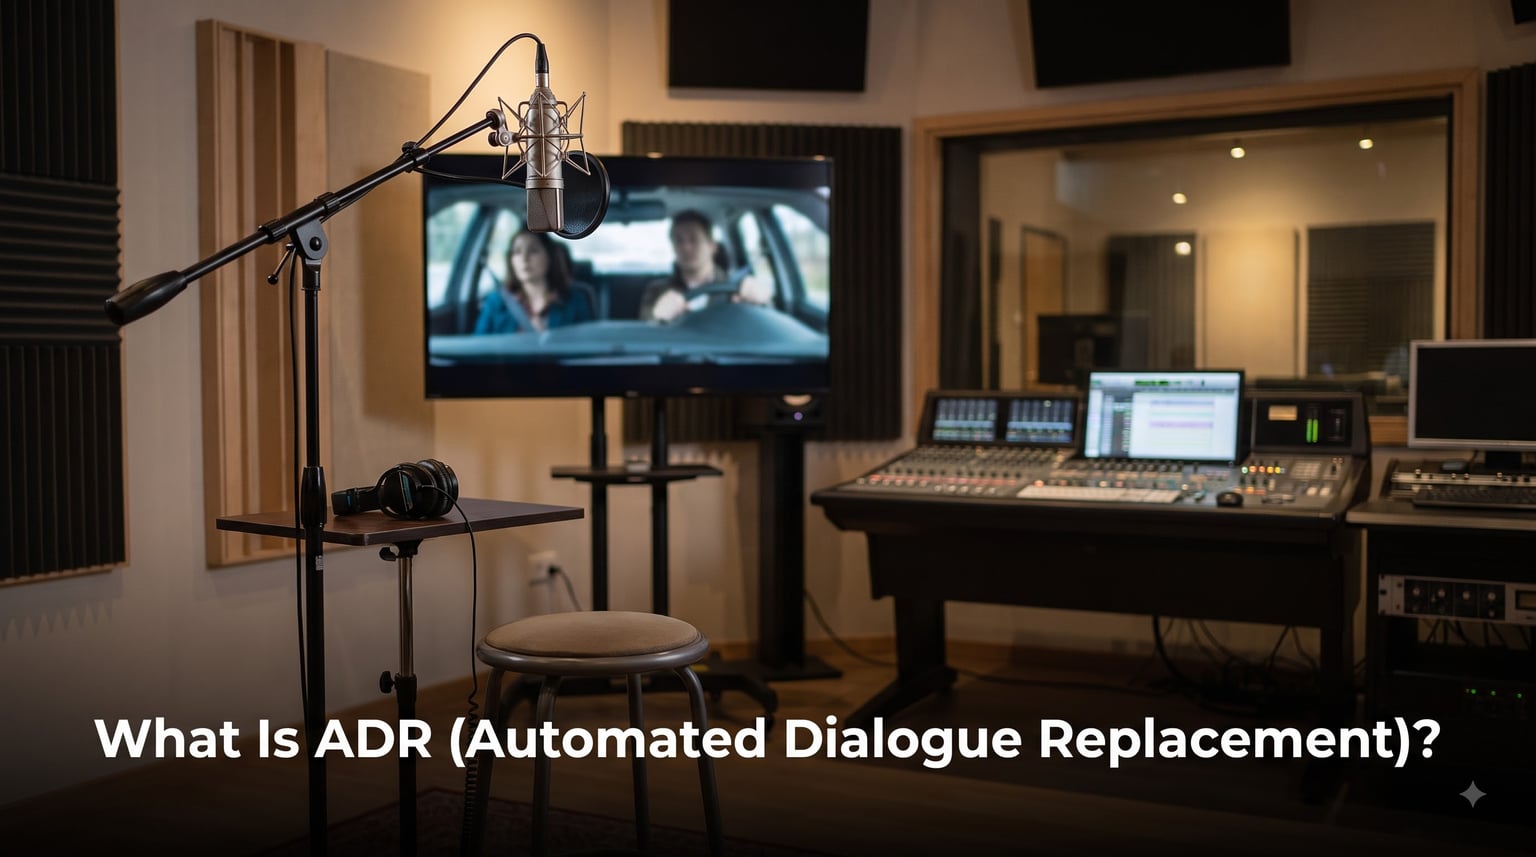
You watch a tense scene in your favourite film. The whispered dialogue cuts through every gust of wind, every passing car, every distant siren. The audio is so clean it feels almost unreal. That clarity is rarely the work of the on-set microphone. It is the work of ADR, an unsung hero of film sound that quietly decides whether your short film sounds amateur or cinematic.
ADR (Automated Dialogue Replacement) is the process of re-recording an actor’s dialogue in a studio after filming is complete, then replacing the original on-set audio with the cleaner, controlled version. The “automated” part refers to the digital tools that lock the new audio to the actor’s lip movements on screen. Almost every film, TV show, and major streaming series uses ADR somewhere in its soundtrack, and understanding it can transform how your own projects sound.
In this guide, I will walk you through exactly what ADR is, why filmmakers rely on it, how the recording process works, and how you can set up ADR for a short film on a tight budget. I have also pulled in forum insights from working filmmakers on Reddit and added a section on spotting bad ADR that no other major article covers.
Let us start with the basics.
Table of Contents
- What Is ADR (Automated Dialogue Replacement)?
- Why Is ADR Used in Film?
- How Does the ADR Process Work Step by Step?
- How to Record ADR: Studio Setup and Best Practices
- How to Edit and Mix ADR Like a Pro?
- ADR Equipment: What You Actually Need
- Famous ADR Examples in Cinema
- ADR for Short Films and Indie Filmmakers
- How to Spot Bad ADR (and Why It Matters)
- Frequently Asked Questions
- Conclusion
What Is ADR (Automated Dialogue Replacement)?
ADR (Automated Dialogue Replacement) is a post-production audio process where actors re-record their dialogue in a studio after the shoot, and engineers replace the original on-set audio with the new recording. The technique is used to fix noisy location audio, refine performance, or change lines that were rewritten during editing.
The term sounds technical, but the concept is simple. Imagine filming a tense scene in a city alley. A garbage truck rumbles past during the take, ruining the audio. Rather than reshoot the whole scene, the actor comes back to a studio weeks later, watches the footage on a screen, and re-delivers the lines while a microphone captures the clean dialogue. An engineer then lines up the new recording with the original picture so the words match the actor’s mouth, and replaces the garbage-truck audio in the final mix.
Why Is It Called “Automated”?
The word “automated” is a historical artefact, not a description of modern software. In the 1960s and 1970s, ADR was originally called “looping” because actors would record their lines in short repeating loops, listening to a section of film, delivering the line, and repeating it again. The film reel itself literally looped back to the same starting point.
When magnetic film and early digital tools arrived, studios developed hardware that automated the synchronisation between the playback loop and the recording. The technique was renamed “Automated Dialogue Replacement” to reflect that the playback-and-record process was now machine-controlled. Today, the “automation” lives inside software like Pro Tools, Reaper, or Studio One, where markers, looped regions, and timecode handle the syncing for you. The label stuck even though the workflow has changed dramatically.
Why Is ADR Used in Film?
ADR exists because film sets are loud, unpredictable, and rarely ideal for capturing clean dialogue. Here are the five main reasons filmmakers use ADR.
1. Noisy On-Set Audio
Wind, traffic, air conditioning, crew chatter, clothing rustle, and electrical hum all seep into production sound. Even a skilled sound mixer struggles to remove every unwanted noise. ADR gives the audio team a clean source to work with, free of the chaos that happened on the day.
2. Performance Improvements
Sometimes a director knows the actor’s take is brilliant on camera, but the delivery could be sharper. ADR lets the actor refine the line without breaking the performance. A few words can be re-recorded and dropped in to lift the emotional arc, even months after the shoot.
3. Script Changes and Rewrites
Films are often re-cut during post-production. Lines get cut, scenes are rearranged, and dialogue gets rewritten in the edit suite. ADR lets actors re-voice the new lines without expensive reshoots. Ridley Scott reportedly used ADR extensively on Blade Runner when the film’s narration was rewritten mid-edit.
4. Wide Shots Where Dialogue Wasn’t Recorded
Wide shots often place the microphone too far from the actor to capture usable dialogue. The on-set audio from these shots is usually a backup reference. ADR is then used to voice the wide-shot version, with the close-up’s cleaner audio carrying the scene’s main emotion.
5. Director’s Creative Control
Directors use ADR to tweak emphasis, swap a word, or adjust the tone. A line that felt perfect on set can be re-recorded because the edit reveals a different rhythm. ADR is a creative tool, not just a fix-it tool, and many directors treat it as part of their storytelling process.
How Does the ADR Process Work Step by Step?
The ADR process follows a fairly standard workflow, from script marking in the edit to the final mix. Here is the six-step journey most productions follow.
Step 1: Script Marking and Cues
The dialogue editor watches the locked cut and identifies which lines need to be re-recorded. They mark each line with a timecode, a short note (called a “cue”), and the duration of the line. These notes go into a script the actor will see in the studio, often called the “ADR script” or “loop sheet.”
Step 2: Dialogue Editing
Before the actor arrives, the dialogue editor cleans up the original production audio. They strip silence, remove obvious noise, and prepare the takes that will be used as reference in the studio. This reference is called the “guide track.”
Step 3: The Recording Session (Studio Setup)
The actor stands in front of a monitor showing the scene. Headphones play back the guide track so they can hear their original performance. The recording engineer counts them in with three beeps, the film loops back to the start of the line, and the actor delivers the line in sync. Multiple takes are recorded so the actor and director can choose the best one later.
Step 4: Syncing the New Audio
Back in the edit, the engineer aligns the new recording to the picture. Tools like VocAlign, Auto-Align, or manual nudge-and-stretch workflows match the new words to the actor’s mouth movements. The aim is not perfection, it is believability. A frame or two of slip is usually invisible to the audience.
Step 5: Editing and Comping
Each cue may have several takes. The engineer “comps” the best sections from each take into a single composite track, smoothing out breaths, plosives, and any mistakes. This is standard practice in dialogue editing and is the same technique used for music production.
Step 6: Mixing and Ambience Matching
The new ADR is blended back into the original scene. The engineer applies EQ, reverb, and compression to match the ADR recording to the room tone of the original location. If step six is done well, the audience will never know the dialogue was re-recorded.
How to Record ADR: Studio Setup and Best Practices
Recording ADR well comes down to preparation. The actor needs to feel the original scene, the engineer needs to capture clean audio, and the director needs to guide the performance. Here is how to set up a session that delivers usable results.
The 3-Beep Guide Track
The classic ADR cue is three beeps. The first two beeps are placed two seconds and one second before the line. The third beep lands exactly on the line’s start. The actor watches the picture, hears the beeps, and delivers the line in time with the third beep. This is the universal timing reference used in studios from Hollywood to bedroom setups.
Microphone Placement
Use a large-diaphragm condenser microphone with a cardioid pattern. Place it 15 to 25 cm from the actor’s mouth, slightly off-axis to reduce plosives. Add a pop filter and a shock mount. The room should be treated with acoustic panels or blankets to prevent room tone from bleeding into the recording. The goal is silence, so any ambient noise you capture in the studio will sound out of place when dropped back into the original scene.
Monitoring and Playback
The actor wears closed-back headphones to hear the guide track and the beeps. The monitor in front of them shows the locked picture with the original audio muted. The director and engineer usually watch from a separate space and communicate via talkback. For indie setups, a simple laptop with a good screen and a quality pair of headphones is enough to start.
Directing the Actor in the Booth
ADR is emotionally tricky. The actor has to recreate a feeling they had weeks or months ago, in a quiet studio that feels nothing like the original set. The best directors help by playing the scene’s emotional context, describing the moment, and reminding the actor what the character was feeling. A solid performance here is the difference between transparent ADR and the awkward, flat delivery that audiences can always spot.
How to Edit and Mix ADR Like a Pro?
Recording is only half the work. The edit and mix decide whether the ADR sounds like it belongs in the scene. Here are the four core steps most engineers follow.
Strip Silence and Align
Use your DAW’s strip silence function to remove the gaps between the actor’s lines. This makes the comping process faster and reduces CPU load. After stripping, align the ADR clip to the original picture using your DAW’s nudge controls or a third-party tool like VocAlign.
EQ Matching and Room Tone
The original location recording has a specific frequency profile shaped by the room, the clothes, and the on-set microphone. Match your ADR to the same profile with a parametric EQ. Tools like iZotope RX, FabFilter Pro-Q, or Eventide Equivocate make this easier by giving you a visual reference of the original take’s frequency curve.
Reverb and Ambience Matching
ADR recorded in a dry studio often sounds unnaturally close. Apply a convolution reverb that matches the original location. You can capture the original room’s impulse response with a starter pistol or a clap, then load it into a reverb like Altiverb or Space. The result is a recording that sounds like it was made in the same space as the visuals.
Volume Automation and Compression
Use automation to ride the level of the ADR line so it matches the original recording’s dynamics. A light compressor with a slow attack and medium release smooths out the variation between words. Be careful not to over-compress. ADR that pumps or ducks sounds unnatural and draws attention to itself.
ADR Equipment: What You Actually Need
You do not need a Hollywood dubbing stage to do ADR. The right setup depends on your budget and the size of your project. Here is what I recommend for two common scenarios.
Beginner / Indie Setup (Under 1000)
Audio interface: Focusrite Scarlett 2i2 or MOTU M2 (around 200)
Microphone: Audio-Technica AT2020 or Rode NT1 (around 100 to 200)
Headphones: Audio-Technica ATH-M50x or Sony MDR-7506 (around 100 to 150)
Software: Reaper (60 licence) or Audacity (free)
Acoustic treatment: Move blankets, foam panels, or a portable vocal booth (around 100 to 300)
This setup is enough to record clean ADR for a short film or indie feature. The biggest weakness is acoustic treatment. Spend the most time here. A treated closet beats a 5,000 mic in a noisy bedroom.
Professional Setup
Audio interface: Avid Pro Tools | Carbon or Universal Audio Apollo (around 1,500 to 5,000)
Microphone: Neumann U87, Sennheiser MKH 416, or Schoeps CMC 6 (around 1,000 to 4,000)
Headphones: Beyerdynamic DT 770 PRO or Sennheiser HD 600 (around 200 to 400)
Software: Avid Pro Tools, Steinberg Nuendo, or Apple Logic Pro (around 600)
Outboard: High-end preamp (Neve, API, or Grace Design) and acoustic treatment from GIK Acoustics or RealTraps
Professional dubbing stages also use calibrated monitors, talkback systems, and timecode-locked projectors. For most short films, the beginner setup is more than enough to get started.
Software and DAW Options
Pro Tools is the industry standard for film audio, but it is not the only option. Reaper is a powerful, affordable alternative used by many indie sound designers. Logic Pro is excellent for Mac users. Audacity is fine for simple ADR on a tight budget. The DAW matters less than the workflow. Pick one that you know well and learn its ADR-specific features.
Famous ADR Examples in Cinema
ADR has shaped some of the most iconic films ever made. Here are four famous examples that show how ADR can rescue a performance, fix a logistical nightmare, or change a film’s story.
The Godfather (Marlon Brando)
Walter Murch, the sound designer on The Godfather, has spoken about how much of Marlon Brando’s dialogue was re-recorded in post-production. Brando’s on-set mumbling was often too quiet to use, and his improvised gestures meant the production audio rarely matched the final cut. ADR preserved the magic of his performance while solving the technical problems.
Blade Runner (Script Changes)
Ridley Scott used ADR to rewrite narration and dialogue throughout Blade Runner‘s edit. The original theatrical release featured voiceover from Harrison Ford that was recorded entirely in post-production. Even the famous “tears in rain” monologue was not scripted in its final form until the edit was nearly locked.
The Lord of the Rings (Airport Noise)
Peter Jackson’s team famously described re-recording dialogue for The Lord of the Rings while a plane flew over the studio. The original on-set audio in New Zealand was often unusable due to wind, rain, and the everyday noise of a busy outdoor production. ADR became a major part of the post-production workload, and the team developed custom workflows to handle hundreds of cues.
Mad Max: Fury Road
Most of Mad Max: Fury Road‘s dialogue was re-recorded in ADR. The film was shot in the Namibian desert with practical vehicles roaring past the actors, making on-set dialogue nearly impossible. Sound designer Mark Mangini and his team turned ADR into an art form, syncing thousands of lines to the kinetic action on screen.
ADR for Short Films and Indie Filmmakers
Most ADR guides assume you are working on a feature with a studio budget. As a short film filmmaker, you are usually working with a small crew, a rented microphone, and actors who may not have done ADR before. Here is how to make ADR work for your project.
When Does a Short Film Need ADR?
You need ADR when the dialogue is critical to the story and the production audio is unusable. Common triggers include noisy locations, lavalier microphones that rubbed against clothing, traffic or wind that drowned out the actor, and scenes where the director wants to change a line after the shoot. ADR is not always necessary. A short film with a naturalistic visual style can sometimes hide imperfect audio with ambient sound and music. The decision is creative, not technical.
DIY Home ADR Setup
A wardrobe packed with clothes is a surprisingly effective vocal booth. So is a bedroom with curtains drawn and a mattress against the wall. The goal is to reduce reflections, not achieve studio silence. I have recorded usable ADR for short films in a hallway closet with a towel draped over a microphone stand. The key is consistency. Record your ADR in the same room with the same microphone and the same setup every time.
Common Mistakes Short Filmmakers Make with ADR
The biggest mistake is recording ADR in a room that sounds different from the location. The mismatch is immediately obvious. A dialogue line recorded in a treated booth does not blend with location audio recorded in a stone alley. The fix is to capture some room tone from the original location and match the ADR to it. The second biggest mistake is poor lip sync. Take the time to nudge the audio into place. A frame or two of slip is forgivable. A word that lands a half-second late is not.
Budget Alternatives to Full ADR
If ADR is not feasible, you have options. Subtitles can carry important lines. Voiceover narration can replace unseen dialogue. Re-cutting the scene to use only the close-ups where the audio is clean can save problem shots. Music and sound design can mask minor audio imperfections. None of these are substitutes for good production sound, but they can salvage a short film when ADR is not an option.
How to Spot Bad ADR (and Why It Matters)
ADR is a craft, and like any craft, it can be done badly. When audiences spot bad ADR, they feel a small drop in immersion. Here are the tell-tale signs.
The Hallmarks of Bad ADR
Bad ADR has matching audio but mismatched emotion. The actor’s words line up with the picture, but the energy feels flat or disconnected. The performance lacks the breathing pattern, the physical presence, or the energy of the original scene. Another tell is the room tone. A line recorded in a studio and dropped into a noisy location will sound thin and dry compared to the surrounding audio. Footsteps, cloth rustle, and room ambience all change when the actor is on a different soundstage.
Frankenbites
A frankenbite is a single line of dialogue stitched together from multiple words recorded across different takes. “I never said she stole my money” might be assembled from three or four takes, with each word coming from a different recording. It is a common ADR technique, but it can sound unnatural if the inflection, pitch, or distance from the microphone changes between the spliced sections. Skilled editors minimise this by using the same take wherever possible and only splicing when absolutely necessary.
The Ethics of Overusing ADR
Reddit filmmakers have long complained that ADR is overused in modern blockbusters. Some actors, especially in action films, appear to voice nearly every line in post-production. The result can feel sterile, and audiences can tell. The honest answer is that ADR is a tool, and like any tool, it can be misused. The best filmmakers use ADR to fix problems, not to replace the entire performance.
Frequently Asked Questions
What does ADR (Automated Dialogue Replacement) mean?
ADR (Automated Dialogue Replacement) is the post-production process of re-recording dialogue in a studio after filming is complete, then replacing the original on-set audio with the cleaner, controlled version. The ‘automated’ part refers to the digital tools that sync the new audio to the actor’s lip movements on screen.
What is ADR in filmmaking?
In filmmaking, ADR is the stage of post-production where actors revoice their lines in a controlled studio environment. It is used to fix noisy production audio, improve performance, or change dialogue after the edit is locked.
What exactly is ‘automated’ about ADR?
The ‘automated’ label comes from the 1960s and 1970s, when studios built hardware that automatically looped the playback film and triggered the recording at the right moment. The word stuck even though modern ADR uses digital markers and software instead of physical loops.
Why is ADR used in film?
ADR is used to fix noisy location audio, refine performances, record new lines after script changes, voice wide shots where the original audio was too far from the actors, and give directors more creative control over dialogue after the shoot is complete.
Do actors get paid for ADR?
Yes, ADR is paid separately from the original shoot. Under SAG-AFTRA and equivalent union agreements in other countries, ADR sessions are paid at a different hourly rate, usually with a minimum session length. Non-union actors can negotiate ADR pay as part of their overall deal, but ADR work is generally considered additional labour and should be compensated.
Does Christopher Nolan use ADR?
Christopher Nolan is known for preferring on-set audio whenever possible, and his films use less ADR than most Hollywood productions. However, even Nolan uses ADR for specific scenes where the production audio is unusable, such as loud action sequences or weather-affected outdoor shots. The difference is that his ADR is mixed lower relative to the production audio, preserving the energy of the original performance.
How long does a typical ADR session take?
A typical ADR session records between 20 and 60 lines per hour, depending on the actor’s experience, the complexity of the lines, and the language. A short film with 50 lines might take two to four hours. A feature with 500 lines can take several weeks of studio time, spread across multiple sessions.
What is the difference between ADR and dubbing?
ADR replaces the original-language dialogue with a cleaner version of the same language, usually performed by the original actor. Dubbing replaces the original-language dialogue with a translated version in a different language, performed by a different voice actor. ADR is generally invisible to the audience. Dubbing is often noticeable and is a common practice in international film distribution.
Conclusion
ADR (Automated Dialogue Replacement) is one of the most important steps in film post-production, and it is something every short film filmmaker can use to lift their sound quality. Start with a treated room, a good microphone, and a clear cue sheet. Record multiple takes, sync the audio to the picture, and match the room tone of the original location. The technique is not glamorous, but it is the difference between audio that sounds amateur and audio that sounds cinematic.
For more on post-production audio and short film workflow, explore the rest of our guides here on Short Film Central.