
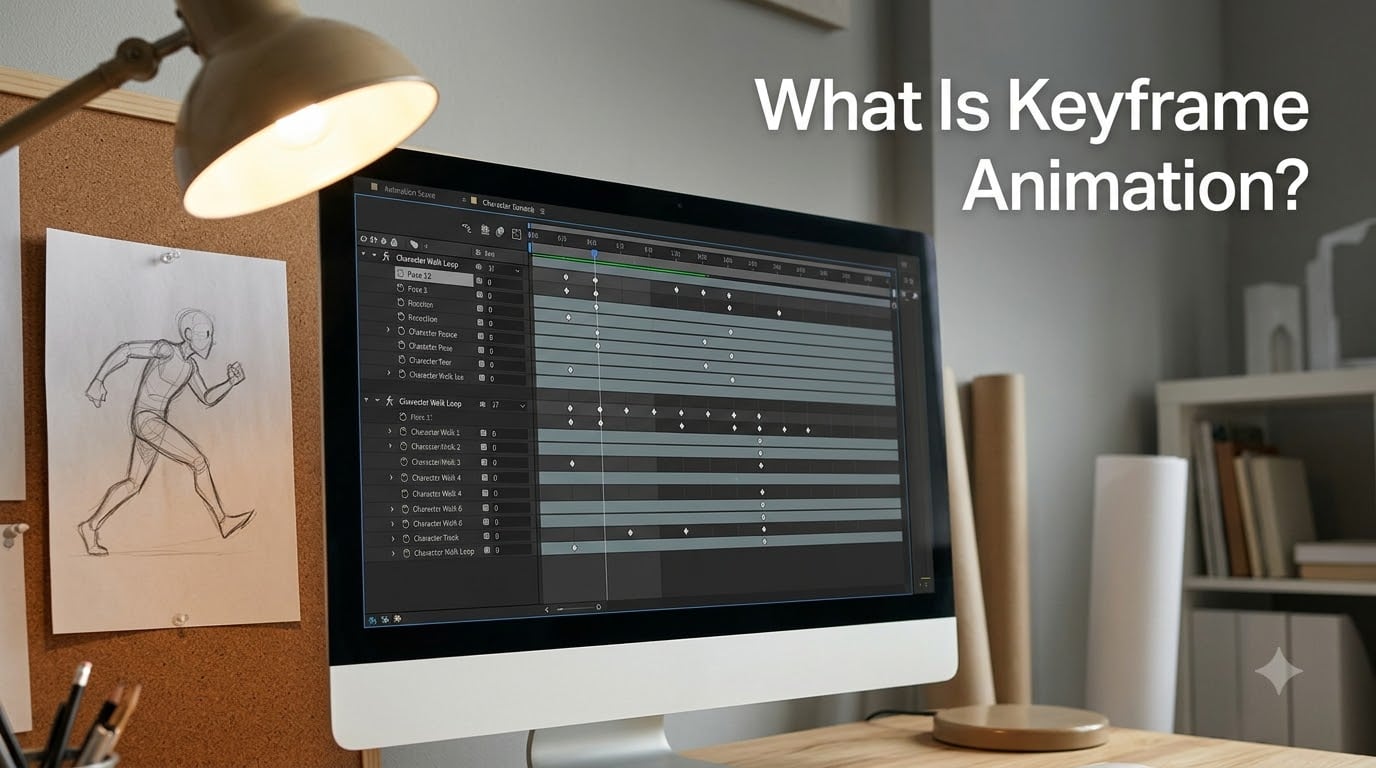
If you have ever wondered how animators make a character walk across a screen or how editors move text smoothly through a scene, the answer is keyframe animation. I remember opening After Effects for the first time and staring at that timeline wondering what a diamond icon meant. Once it clicked, everything about animation made sense.
This guide explains what keyframe animation is, how it works, and why it matters for anyone making short films or motion graphics. You will learn the difference between keyframes and regular frames, what interpolation means, and how to apply these ideas in real projects.
Table of Contents
- What Is Keyframe Animation? A Clear Definition
- How Keyframes Work: Start and End Points
- Keyframes vs Frame-by-Frame Animation
- What Is Interpolation and Tweening?
- Types of Keyframe Interpolation Explained
- Common Parameters You Can Animate
- Keyframe Animation in Short Film Production
- Practical Tips From Working Animators
- Frequently Asked Questions
- Conclusion
What Is Keyframe Animation? A Clear Definition
Keyframe animation is a technique where you define the starting and ending points of a change, and the software calculates everything in between. The word “keyframe” comes from traditional hand-drawn animation, where lead animators sketched the most important poses and junior artists filled in the rest.
In digital tools, a keyframe is simply a marker on a timeline that stores a value for a property at a specific moment. When you place two keyframes with different values, the software generates the transition automatically. That automated fill-in process is called tweening.
Think of it like planning a road trip. You mark your starting city and your destination. The route between them gets handled by the system. In animation, you mark your starting pose and your ending pose, and the software handles the route.
Keyframe animation lives inside nearly every modern creative tool. You will find it in After Effects, Blender, Premiere Pro, DaVinci Resolve, CapCut, and even web design platforms. Anyone creating a short film will encounter keyframes at some point in their workflow.
How Keyframes Work: Start and End Points
Every keyframe animation follows the same basic logic. You place a starting keyframe, move forward in time, place an ending keyframe, and the software fills the gap. The starting keyframe holds the initial value, and the ending keyframe holds the new value.
For example, suppose you want a title to slide in from the left side of the screen. At time zero, you set the position property to be off-screen left. At time one second, you set the position property to be centered. The software then calculates every frame between those two moments, producing a smooth slide.
Behind the scenes, several pieces work together. The timeline is your horizontal track of time. The playhead is the vertical line showing where you are in that timeline. Each animated property has its own track, and each keyframe is a small diamond or dot on that track.
You can animate almost any property that has a numeric value. Position, scale, rotation, and opacity are the most common, but you will also find color, blur, audio volume, and many others. Each one is a separate parameter you can keyframe independently.
The beauty of this system is efficiency. You only define the moments that matter. The software handles the hundreds of frames that exist between your key poses, saving you the labor of drawing or adjusting each one.
Keyframes vs Frame-by-Frame Animation
Frame-by-frame animation means adjusting or drawing every single frame by hand. It gives you total control but requires enormous effort. Keyframe animation means defining only the essential poses and letting software fill the rest.
The difference matters for short film creators because of time and budget. A two-minute short film running at 24 frames per second contains 2,880 frames. Drawing each one would take weeks. Using keyframes, you might only need to set 20 to 40 poses per character, and the computer handles the rest.
That said, both methods have their place. Frame-by-frame work shines for stylized 2D shorts with squash-and-stretch appeal. Keyframe animation shines for 3D characters, motion graphics, and technical shots. Many professional studios combine both approaches in a single production.
If you are just starting out, keyframe animation is usually the faster path. You get smoother motion with less effort, and you can iterate quickly when a shot does not feel right.
What Is Interpolation and Tweening?
Interpolation is the math that happens between your keyframes. When the software knows your starting value and your ending value, it calculates the values at every frame in between using a formula. That calculation is interpolation.
Tweening is the older term for the same idea, short for “in-betweening.” In traditional studios, junior animators drew the in-between frames by hand to connect the lead animator’s key poses. Today, software does this work automatically, but we still call it tweening out of habit.
The term “in-betweens” also survives from that era. An in-between is any frame that exists between two keyframes. In a modern animation, an in-between is a frame where the software has computed a value automatically rather than one you placed manually.
Understanding interpolation helps you control how motion feels. A linear interpolation feels mechanical. An eased interpolation feels natural because it mimics how real objects accelerate and decelerate. Choosing the right interpolation is half the craft of keyframe animation.
Types of Keyframe Interpolation Explained
Most animation software offers several interpolation types. Each one changes how the motion flows from one keyframe to the next. Picking the right type is what separates stiff motion from believable motion.
Linear interpolation moves at a constant speed from start to end. The value changes by the same amount every frame. This is the default in many tools, and it often feels robotic. Use it for mechanical elements like sliding panels or HUD elements.
Ease interpolation starts slow, speeds up in the middle, and slows down at the end. It mimics how objects move in the real world due to inertia. Ease is usually the best default for character movement because it feels alive.
Bezier interpolation gives you custom control over the acceleration curve. You drag handles to shape exactly how the motion eases in and out. Professional animators spend a lot of time tweaking bezier curves because they offer the most expressive control.
Hold interpolation keeps the starting value frozen until the next keyframe, then jumps instantly. This is perfect for strobe effects, hard cuts in motion graphics, or any time you want no smooth transition at all.
For short film work, I find myself using ease for most character moves, bezier for camera moves and dramatic moments, linear for technical elements, and hold for glitch or stinger effects. Mixing them in a single scene adds visual interest.
Common Parameters You Can Animate
Once you understand keyframes, the next question is what you can actually animate. The short answer is anything with a numeric value. The long answer covers a handful of properties you will use constantly.
Position moves an object along the X and Y axes. This is how you make things slide, fly, or drift across the frame. Position is the most animated property in any short film.
Scale changes the size of an object. You can grow a logo on screen, shrink a character walking into the distance, or create a dramatic zoom effect. Scale works on the X and Y axes independently, so you can stretch and squash.
Rotation spins an object around its anchor point. Wheels, doors, planets, and graphic elements all rely on rotation. Combine it with position for arcs and curved paths.
Opacity controls transparency. Fades, dissolves, and ghosting effects all use opacity keyframes. It is also useful for layering multiple animated elements that enter or exit the frame.
Anchor point defines the center around which scale and rotation operate. Moving the anchor point changes how an object appears to swing or pivot. Most beginners leave this alone, but it is powerful once you understand it.
Beyond these basics, most tools expose dozens of additional properties. Color, blur, distortion, audio volume, and effect-specific parameters all support keyframes. As you grow more comfortable, you will discover new ones for every project.
Keyframe Animation in Short Film Production
Short film creators rely on keyframe animation in three main ways: scene blocking, character animation, and motion graphics. Each one uses the same underlying system but serves a different storytelling purpose.
Scene blocking refers to placing and moving elements within a frame. Think of a camera pushing in, a window opening, or a shadow creeping across a wall. These are nearly always done with keyframes because the software can simulate camera moves that would be impossible or expensive to shoot live.
Character animation in a 3D or rigged 2D pipeline also uses keyframes. An animator poses a character at frame 0, poses them again at frame 24, and the rig interpolates between those poses. This is the heart of every CGI short you have ever watched.
Motion graphics covers titles, lower thirds, transitions, and visual effects layered on top of footage. Keyframes make text fly in, logos spin, and particles burst at exactly the right moment. For a short film festival piece, polished motion graphics often make the difference between an amateur look and a professional look.
One practical tip from my own short film work: keep a separate composition or project for your motion graphics elements. It makes it much easier to reuse title cards across multiple shorts and to iterate on a single shot without breaking the rest of the edit.
Practical Tips From Working Animators
After reading through forums and talking with fellow short film creators, a few pieces of advice come up again and again. These are the lessons that save beginners hours of frustration.
First, place keyframes where the motion feels right, not where the math says you should. Animators on Reddit emphasize that timing and spacing matter more than keyframe quantity. A well-placed keyframe every ten frames will look better than a poorly placed one every two frames.
Second, do not confuse keyframes with extremes and breakdowns. A keyframe marks a property value at a moment. An extreme is a key pose showing the most stretched position. A breakdown is a transitional pose between two extremes. All extremes and breakdowns are keyframes, but not all keyframes are extremes.
Third, start with rough keyframes and refine later. Block out your scene with simple linear keyframes to get the timing right. Once the timing works, go back and adjust interpolation types and bezier handles for polish. Trying to do everything at once leads to endless tweaking.
Fourth, watch your animation at full speed before judging it. Scrubbing through the timeline frame by frame distorts your sense of motion. Play it back, watch it like a viewer would, and only then decide what needs fixing.
Frequently Asked Questions
What is a keyframe in animation?
A keyframe is a marker on a timeline that stores the value of an animated property at a specific moment in time. When you place two or more keyframes with different values, the software calculates the transition between them automatically to produce motion.
Is keyframe animation hard?
Keyframe animation is one of the more approachable animation techniques for beginners. The basic idea of setting start and end points is easy to grasp. Mastering timing, spacing, and bezier curves takes practice, but anyone can produce decent motion within a few days of learning.
What is the purpose of a keyframe?
Keyframes let you define the most important moments in a motion while the software handles the rest. They save enormous amounts of time, ensure smooth transitions, and let you iterate quickly when a shot needs adjustment. They are the foundation of every digital animation workflow.
How to create a keyframe?
Open your animation software and find the property you want to animate on the timeline. Move the playhead to the starting time and click the stopwatch or diamond icon to create your first keyframe. Move the playhead to a later time, change the property value, and the software will create a second keyframe automatically.
Conclusion
Keyframe animation is the backbone of modern digital motion, from blockbuster shorts to quick social media clips. By marking starting and ending values, you let the software handle the heavy lifting of producing smooth transitions.
For your next short film project, try opening a timeline and keyframing a single object across the screen. Once that feels natural, layer in a second animated property, then a third. Within an hour, you will have a small animated scene you built entirely with keyframes.
At Short Film Central, we will keep exploring the tools and techniques that help independent filmmakers tell better stories. If you want to dive deeper into animation, compositing, or any other corner of short film production, our upcoming guides will get you there.
1 thought on “What Is Keyframe Animation? A Complete Guide (October 2026)”