
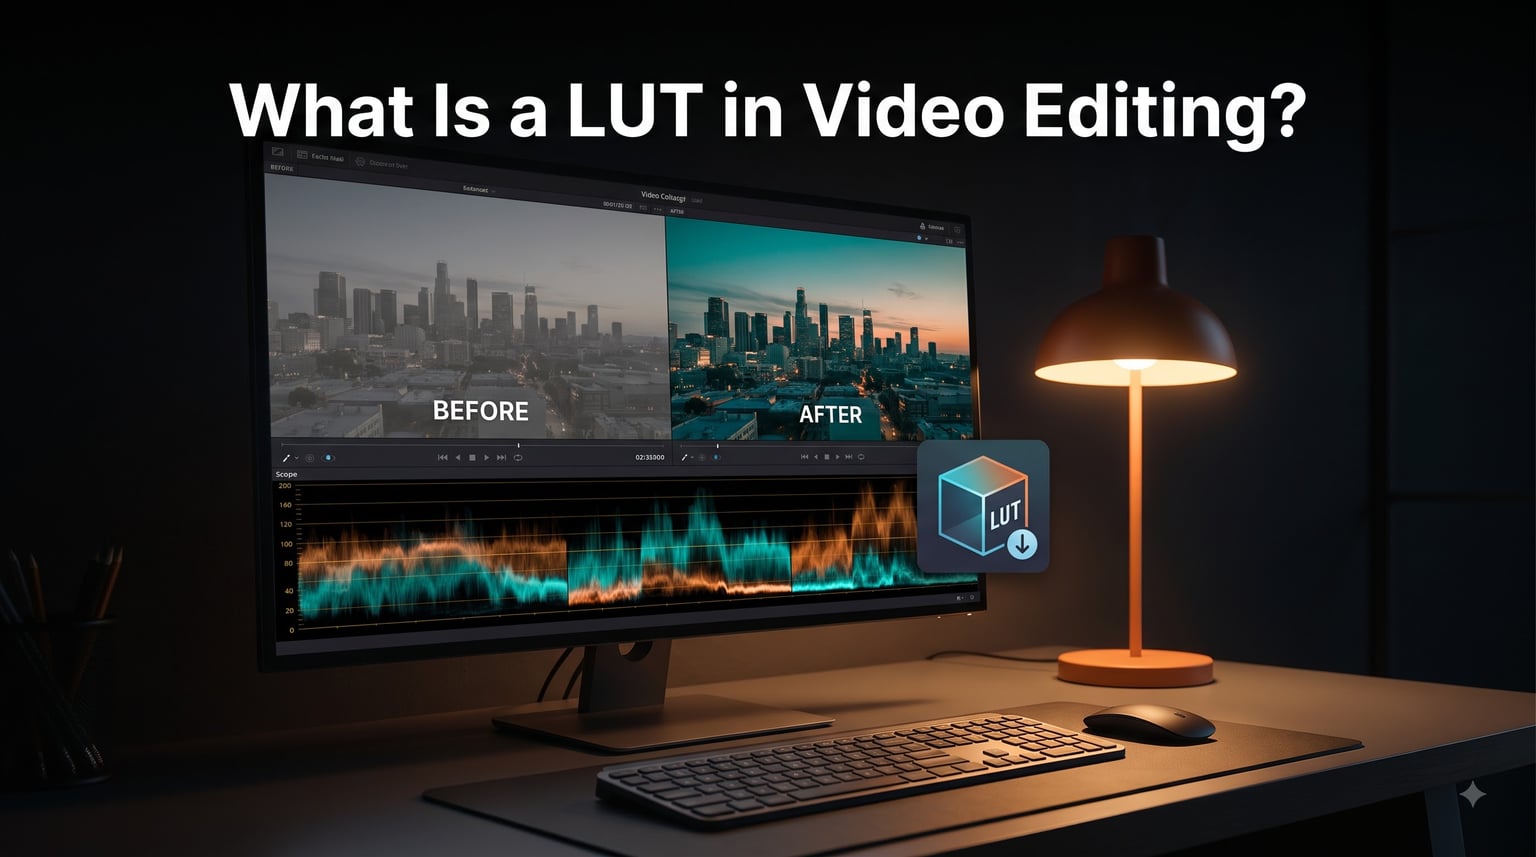
A LUT (Look-Up Table) is a file that maps one set of color values to another, letting you instantly transform the look of your video footage. If you have ever wondered what is a LUT in video editing and whether you need one, this guide breaks down everything from the basics to advanced workflows.
Our team has spent years color grading short films, and LUTs are one of the first tools we reach for on every project. They save time, create consistency across scenes, and help you achieve a cinematic look without spending hours on manual color correction.
In this guide, you will learn what LUTs are, how they work, the difference between 1D and 3D LUTs, how to apply them in Premiere Pro and DaVinci Resolve, and the common mistakes that can ruin your footage. Whether you are editing your first short film or refining a professional workflow, this article gives you the practical knowledge you need.
Table of Contents
- What Is a LUT in Video Editing?
- How LUTs Actually Work
- 1D LUT vs 3D LUT: What’s the Difference?
- Technical vs Creative LUTs
- Why Log Footage Matters for LUTs?
- LUTs vs Color Grading: What’s the Difference?
- How to Apply LUTs in Your Editing Software?
- Common LUT File Formats Explained
- Common LUT Mistakes to Avoid
- Creating Your Own Custom LUTs
- FAQs
- Conclusion
What Is a LUT in Video Editing?
A LUT in video editing is a mathematical formula stored in a small file that tells your editing software how to remap colors from their original values to new ones. Think of it as a color translation dictionary: for every input color, the LUT looks up the matching output color and applies it.
The term “LUT” stands for Look-Up Table, and that name describes the process perfectly. When you apply a LUT, your software reads each pixel, checks the table for what that color should become, and makes the swap. This happens across every frame of your footage in seconds.
Here is a simple way to picture it. Imagine a spreadsheet where column A lists every possible input color and column B lists the replacement color. That spreadsheet is your LUT. When the software encounters a specific shade of blue in your footage, it checks column A, finds the match, and swaps in the color from column B.
Unlike Instagram filters or simple presets, LUTs are precise mathematical operations. They do not guess or approximate. Every color transformation is deterministic, which means the same LUT applied to the same footage will always produce identical results.
This precision is why LUTs are the backbone of professional color grading workflows. A colorist can build a specific look as a LUT and apply it across an entire film, knowing every shot will receive the exact same treatment.
How LUTs Actually Work
To understand how LUTs work, you need to think in terms of input and output values. Every pixel in your video has three color channels: red, green, and blue. Each channel has a numeric value, typically ranging from 0 to 1023 for 10-bit footage or 0 to 255 for 8-bit footage.
When you apply a LUT, the software takes each pixel’s RGB values and feeds them into the lookup table as input. The table then outputs a new set of RGB values. If your original pixel was a flat gray at R512 G512 B512, the LUT might output a warm tone at R580 G510 B440 instead.
This process repeats for every single pixel in every single frame. A 4K frame contains over 8 million pixels, and at 24 frames per second, your software is performing millions of color lookups per second. Modern editing software handles this efficiently, which is why LUTs can be applied in real time during playback.
The key thing to understand is that a LUT does not analyze your footage or make intelligent decisions. It applies the same transformation regardless of context. If a LUT is designed to warm up highlights, it will warm up highlights whether your footage was shot at golden hour or under fluorescent office lights. This is why LUTs work best as a starting point, not a final answer.
1D LUT vs 3D LUT: What’s the Difference?
LUTs come in two main types: 1D and 3D. The difference comes down to how many color channels the LUT can manipulate and how complex those manipulations can be. Understanding this distinction is essential for choosing the right tool for your footage.
1D LUTs: Simple Channel Adjustments
A 1D LUT operates on each color channel independently. It adjusts red, green, and blue separately without considering how they interact. This makes 1D LUTs perfect for tasks like gamma correction, basic contrast adjustments, and tone mapping along a single curve.
Think of a 1D LUT as three separate adjustments happening side by side. The red channel gets its own treatment, green gets its own, and blue gets its own. None of them know what the other two are doing.
Because of this independence, 1D LUTs cannot change the actual hue of a color. They can make a red brighter or darker, but they cannot turn that red into an orange. That limitation makes 1D LUTs useful for technical calibration but insufficient for creative color grading.
3D LUTs: Full Color Control
A 3D LUT considers all three color channels simultaneously. It can see how red, green, and blue interact and adjust them as a group. This means a 3D LUT can shift hues, change saturation based on brightness, and create complex color relationships that mimic film stocks or specific cinematic looks.
When you hear someone talk about applying a LUT for a teal-and-orange blockbuster look or a faded film emulation, they are using a 3D LUT. These are the creative powerhouses that most filmmakers actually care about.
3D LUTs work by dividing the full RGB color space into a three-dimensional grid. A typical 3D LUT uses a 33-point or 65-point grid, meaning it defines specific color transformations at thousands of points within the color cube. The software interpolates between those points to handle colors that fall between grid intersections.
For short film work, 3D LUTs are almost always what you want. They give you the creative flexibility to build a distinctive visual identity for your project. 1D LUTs still play a role in technical setups, but the look your audience notices comes from the 3D LUT.
Technical vs Creative LUTs
Not all LUTs serve the same purpose. The two main categories you will encounter are technical LUTs and creative LUTs, and knowing the difference prevents some of the most common color grading mistakes we see from new editors.
Technical LUTs: Conversion and Calibration
Technical LUTs handle color space conversions and calibration tasks. Their job is to accurately transform footage from one color standard to another. The most common example is a log-to-Rec.709 LUT, which converts flat, desaturated log footage into a standard, viewable image.
Camera manufacturers often provide their own technical LUTs. Sony has S-Log3 to Rec.709 LUTs, Canon provides Canon Log conversions, and Blackmagic Design ships LUTs for their various log formats. These are designed specifically for each camera’s color science, so they produce accurate baseline conversions.
You apply a technical LUT early in your workflow to normalize footage. Once the conversion is done, you have a clean, natural-looking starting point that you can then grade creatively.
Creative LUTs: Style and Mood
Creative LUTs are all about aesthetics. They apply a specific visual style, like a warm summer afternoon, a cold thriller palette, or a vintage 16mm film look. These LUTs push colors in artistic directions rather than technically accurate ones.
The important distinction is that creative LUTs should be applied after technical correction, not before. If you slap a creative LUT onto raw log footage, the results will look wrong because the LUT was designed to work with footage that has already been converted to a standard color space.
Many beginners grab a creative LUT, apply it to uncorrected footage, and wonder why everything looks terrible. The answer is almost always that they skipped the technical step first.
For short film creators, creative LUTs are where you define your visual signature. Once you find a look that matches your story’s tone, that LUT becomes part of your project’s identity across every scene.
Why Log Footage Matters for LUTs?
Log footage is at the center of why LUTs became so important in modern filmmaking. If you shoot in a log profile, your footage comes out looking flat, gray, and desaturated. That is intentional. The camera is capturing a wider dynamic range by compressing highlights and shadows into a smaller, flatter tonal space.
The problem is that nobody wants to watch a movie that looks like flat gray mush. This is where LUTs come in. A log conversion LUT expands that compressed data back into a rich, contrasty image with proper color saturation. Without this step, log footage is essentially unviewable.
Forum discussions from working videographers make this point repeatedly. Log footage was developed to capture more dynamic range, but it requires a LUT or manual conversion to look correct. Shooting log without understanding how to convert it is one of the fastest ways to produce disappointing footage.
Most cameras that offer log recording also provide a recommended LUT for that profile. Sony offers S-Cinetone and S-Log3 LUTs. Canon has Cinema Gamut conversions. Blackmagic Design includes LUTs for their Film and Extended Video modes. Starting with the manufacturer’s own LUT gives you the most accurate baseline.
If you are shooting in Rec.709 or a standard picture profile rather than log, you do not need a conversion LUT. Your footage already looks normal. You can go straight to creative grading, but be aware that you have less dynamic range to work with in post.
LUTs vs Color Grading: What’s the Difference?
This is one of the most common questions we see from filmmakers who are just getting into post-production. The short answer is that a LUT is a tool used within the broader process of color grading. They are not the same thing.
Color grading is the complete process of adjusting the color, contrast, and tone of your footage to create a consistent visual style. It involves balancing shots, matching clips from different cameras or lighting setups, and building a unified look across an entire project. A professional color grade can involve dozens of adjustments across multiple layers.
A LUT is a single component within that process. It applies one specific, predetermined color transformation. Some colorists use LUTs as a starting reference, then build their full grade on top. Others skip LUTs entirely and build every adjustment manually using tools like DaVinci Resolve’s node-based color page.
On the r/videography community, experienced editors frequently clarify this point. LUTs are not meant to be the final creative grade. They are a starting point or a conversion tool. A LUT cannot read your footage and decide that one shot needs more shadow detail while another needs less warmth. Only a human colorist or careful manual grading can do that.
The distinction matters because treating a LUT as a complete color grade leads to inconsistent results. Two shots from different lighting setups will respond differently to the same LUT. You still need to balance and adjust each clip individually after applying the LUT.
How to Apply LUTs in Your Editing Software?
Applying a LUT is straightforward once you know where to look, but every major editing program handles it slightly differently. Here are step-by-step instructions for the three most popular NLEs used by short film creators.
How to Apply a LUT in Premiere Pro
Adobe Premiere Pro makes LUT application simple through the Lumetri Color panel. The process takes just a few clicks once you know where everything lives.
Step 1: Select the clip on your timeline that you want to affect.
Step 2: Open the Lumetri Color panel from the Window menu if it is not already visible.
Step 3: Scroll to the Creative section and expand it.
Step 4: Click on the Look dropdown, which shows your currently installed LUTs. Premiere Pro includes several built-in looks, or you can browse to import your own .cube files.
Step 5: Use the Intensity slider below the Look selector to control how strongly the LUT affects your footage. Many experienced editors recommend dialing this back to 60-80 percent rather than leaving it at full strength, which can make footage look overprocessed.
Step 6: Fine-tune with the Basic Correction controls above the Creative section. Adjust exposure, white balance, and contrast to compensate for how the LUT interacts with your specific footage.
How to Apply a LUT in DaVinci Resolve
DaVinci Resolve is built around professional color grading, so its LUT handling is the most robust of any NLE. The Color page is where everything happens.
Step 1: Switch to the Color page by clicking the Color tab at the bottom of the interface.
Step 2: Select the clip you want to affect from the timeline at the bottom.
Step 3: Right-click on a node in the node graph and choose LUT from the context menu. This opens a browser showing all installed LUTs organized by folder.
Step 4: Navigate to the LUT you want and click it. The LUT is applied to that node instantly.
Step 5: For more control, apply your technical conversion LUT to the first node and your creative LUT to a second node. This keeps your workflow organized and makes it easy to swap creative looks without touching the technical conversion.
Step 6: Adjust the Key Output Gain on the node to control LUT intensity. Lowering the gain reduces the LUT’s effect, similar to the intensity slider in other programs.
DaVinci Resolve users on professional forums consistently praise this node-based approach because it gives you total flexibility. You can stack multiple LUTs, mask specific areas, and fine-tune each element independently.
How to Apply a LUT in Final Cut Pro
Final Cut Pro handles LUTs through its Effects system rather than a dedicated color panel.
Step 1: Select your clip in the timeline.
Step 2: Open the Effects browser and search for Custom LUT.
Step 3: Drag the Custom LUT effect onto your clip.
Step 4: In the Inspector, click the LUT dropdown to select from built-in options or click Choose Custom to load your own .cube file.
Step 5: Use the Mix slider to control how strongly the LUT is applied. As with Premiere Pro, reducing the mix slightly often produces more natural results.
LUT Intensity Tips
One of the most consistent pieces of advice from professional colorists across forum discussions is this: reduce your LUT intensity. Full-strength LUTs can crush shadows, blow out highlights, and push skin tones into unnatural territory. Dialing back to 70 or 80 percent often gives you the stylistic benefit without the artificial edge.
Common LUT File Formats Explained
LUTs come in several file formats, and compatibility varies between software. Knowing which formats your editing program supports saves you from downloading a LUT you cannot use.
The .cube format is the most widely supported LUT file type. Developed by Iridas, it is now an industry standard accepted by Premiere Pro, DaVinci Resolve, Final Cut Pro, After Effects, and most other professional tools. If you download or purchase a LUT pack, the .cube format is what you will typically receive.
The .3dl format is another 3D LUT type used primarily in Autodesk Lustre and some older color grading systems. You may encounter it if you are working with legacy workflows or specific hardware calibration tools.
The .look format is specific to Speedgrade and some Adobe workflows. It is less common now but still appears in older LUT collections.
DaVinci Resolve also supports its own .drx format for Resolve-specific color operations, though these are more like saved power grades than traditional LUTs.
For short film work, stick with .cube files. They work everywhere, they are easy to share between collaborators, and every major LUT creator distributes in this format.
Common LUT Mistakes to Avoid
Forum discussions from working editors reveal the same mistakes repeatedly. Learning these before you start grading will save you hours of frustration and protect your footage from avoidable damage.
Applying LUTs to Uncorrected Footage
The number one mistake is applying a creative LUT before fixing basic exposure, white balance, and contrast. LUTs are designed with the assumption that your footage starts from a normal baseline. If your clip is two stops underexposed with a green tint, the LUT will amplify those problems rather than fix them.
Always do basic color correction first. Balance your shot, fix exposure, and neutralize any color casts. Then apply your LUT.
Using LUTs at Full Strength
As mentioned earlier, full-strength LUTs frequently look artificial. Professional editors on r/davinciresolve and r/videography repeatedly advise reducing intensity. The LUT was designed as a strong starting point, assuming you would dial it back to taste.
Applying Log Conversion LUTs to Non-Log Footage
If your footage was shot in Rec.709 or a standard picture profile, do not apply a log conversion LUT. The LUT expects desaturated, low-contrast log footage as input. Feeding it already-normal footage produces washed-out, incorrectly contrasted results. This is a common mistake for beginners who think all LUTs are interchangeable.
Treating LUTs Like Filters
LUTs are not Instagram filters. They are not designed to be slapped on with no thought and expected to produce a finished look. A LUT gets you partway there. You still need to adjust per shot, match clips, and build a consistent grade across your timeline.
Community members on filmmaking forums are blunt about this. If you are applying a LUT and calling your color grade done, your footage probably does not look as good as you think it does.
Ignoring Color Space Mismatches
Some LUTs are designed for specific color spaces. A LUT built for Rec.709 footage will not produce correct results if applied to Rec.2020 or DCI-P3 footage. Always check that your working color space matches what the LUT expects. DaVinci Resolve handles this well with its color management system, but other software may require manual attention.
Creating Your Own Custom LUTs
One of the biggest advantages professional colorists have over beginners is custom LUTs. Instead of relying on purchased packs, they build looks from scratch and export them as LUTs for consistent application across a project. This is a high-value skill that no major competitor in our research covers in depth.
The process in DaVinci Resolve is straightforward. You build your desired look using nodes, wheels, curves, and qualifiers on a representative clip. Once you are happy with the result, you right-click the clip thumbnail and select Generate LUT. Resolve exports your grade as a .cube file that you can apply to other clips or save for future projects.
Premiere Pro offers a similar feature through the Lumetri Color panel. After building your look, you can export it as a .cube file by selecting the appropriate option from the panel menu.
The advantage of custom LUTs is consistency. If you are shooting a short film over multiple days or locations, a custom LUT ensures every scene shares the same visual DNA. You can apply it across all clips, then make small per-shot adjustments on top.
Forum discussions reveal that many professionals prefer custom PowerGrades in DaVinci Resolve over static LUTs. PowerGrades are editable node trees that you can fine-tune per shot while maintaining the same foundational look. This approach gives you the consistency of a LUT with the flexibility of manual grading.
For short film creators specifically, building a custom LUT early in your edit can define your entire visual identity. Pick a hero shot that represents your project’s mood, craft the perfect grade, export it as a LUT, and apply it across your timeline as a starting reference for every scene.
FAQs
What is the purpose of a LUT?
The purpose of a LUT is to quickly and consistently transform colors in your video footage by mapping input color values to predefined output values. LUTs serve two main functions: technical conversion (like transforming flat log footage into a normal, viewable image) and creative styling (applying a specific cinematic look or mood).
Is a LUT the same as color grading?
No, a LUT is not the same as color grading. Color grading is the complete process of adjusting color, contrast, and tone to create a consistent visual style across your project. A LUT is a single tool used within that process. It applies one predetermined color transformation and serves as a starting point that a colorist then refines with additional adjustments.
Are LUTs necessary for video editing?
LUTs are necessary if you shoot in a log profile, because log footage requires conversion to look correct. For standard Rec.709 footage, LUTs are optional but helpful. They save time, create consistency across shots, and let you achieve professional looks without manual color correction on every clip. Many editors use them as a workflow shortcut rather than a requirement.
How do I add LUTs to my video?
To add a LUT in Premiere Pro, open the Lumetri Color panel, go to the Creative section, and select a look from the dropdown or import a .cube file. In DaVinci Resolve, switch to the Color page, right-click a node, and choose your LUT from the browser. In Final Cut Pro, apply the Custom LUT effect from the Effects browser and select your LUT file in the Inspector.
Conclusion
Understanding what is a LUT in video editing comes down to one core idea: a LUT is a mathematical color translation tool that transforms your footage quickly and consistently. Whether you need to convert flat log footage into a viewable image or apply a cinematic look across your entire short film, LUTs are one of the most efficient tools in your post-production toolkit.
Start with the basics. Fix your exposure and white balance first, apply a technical conversion LUT if you shot log, then layer a creative LUT at reduced intensity. Fine-tune per shot, and consider building a custom LUT to define your project’s visual identity.
The best way to learn is by doing. Grab a free LUT pack, drop it onto your footage, and experiment with intensity, layering, and custom adjustments. Your next short film’s color grade starts with understanding these fundamentals.