
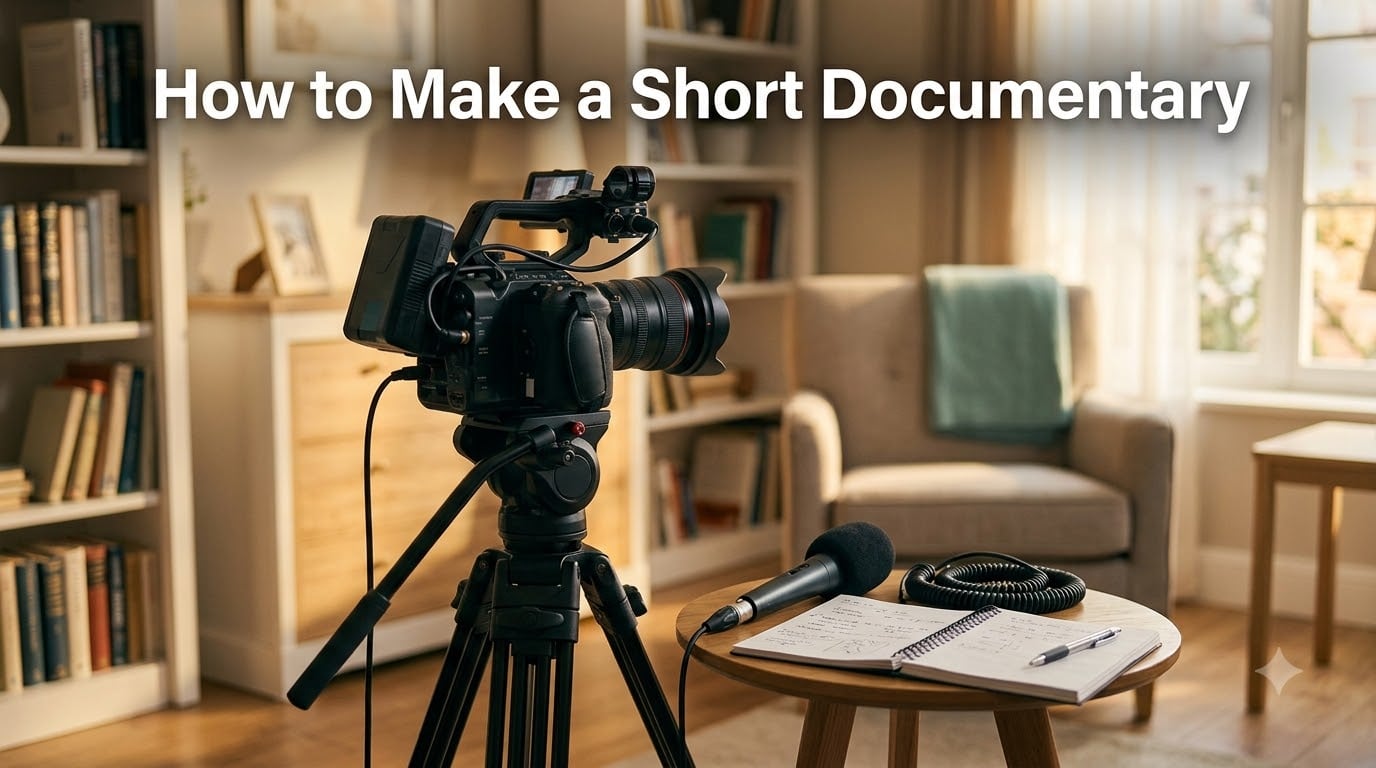
I have spent years behind the camera, and if there is one thing I have learned, it is that you do not need a Hollywood budget to tell a real story. Learning how to make a short documentary is one of the most rewarding creative projects you can take on. A compelling 10-minute film about a local bakery, a community hero, or a personal family story can move people just as deeply as anything streaming on Netflix.
This guide walks you through the entire documentary filmmaking process from concept to final cut. Whether you are a student working on a class project, a brand looking to connect emotionally with customers, or a first-time filmmaker with zero experience, you will find practical, field-tested advice here.
Our team drew on our own production experience plus real-world tips shared by working filmmakers in online communities. We focus on what actually works on set and in the editing room, not theory. By the end of this guide, you will have a complete roadmap to plan, shoot, edit, and share your short-form documentary with confidence.
Table of Contents
- The 8-Step Process at a Glance
- What Is a Short Documentary?
- Why Make a Short Documentary?
- How Long Should a Short Documentary Be?
- Essential Equipment for Documentary Filmmaking
- How to Make a Short Documentary: Step-by-Step Process
- Step 1: Choose Your Topic and Define Your Angle
- Step 2: Research and Develop Your Story
- Step 3: Write a Documentary Treatment or Script
- Step 4: Plan Your Shoot (Pre-Production)
- Step 5: Film Interviews and B-Roll
- Step 6: Log and Organize Your Footage
- Step 7: Edit Your Documentary
- Step 8: Add Sound Design, Music, and Color
- How to Film a Documentary by Yourself (One-Person Crew Techniques)
- Smartphone Filmmaking Tips for Documentaries
- Copyright and Legal Considerations
- Common Mistakes to Avoid
- Distribution: Where to Share Your Short Documentary
- FAQs
- Final Thoughts on Making Your Short Documentary
The 8-Step Process at a Glance
Before we get into the details, here is a quick-reference breakdown of how to make a short documentary from start to finish:
Choose your topic and define a specific angle
Research your subject and develop the story arc
Write a treatment or outline your documentary script
Plan your shoot including locations, subjects, and scheduling
Film interviews and B-roll capturing both conversation and atmosphere
Log and organize footage before touching the timeline
Edit your documentary building the narrative scene by scene
Add sound, music, and color then distribute your finished film
Now let us walk through each phase in detail so you know exactly what to do at every stage.
What Is a Short Documentary?
A short documentary is a brief non-fiction film, typically ranging from 2 to 30 minutes, that tells a focused, real-world story using interviews, B-roll footage, and narrative structure. Unlike a feature documentary that may run 90 minutes or longer, a short documentary zeroes in on one central subject, person, event, or theme.
People use a few different terms for this format. A mini documentary usually runs 2 to 10 minutes and focuses on a single storyline or character. A micro documentary is even shorter, often under 5 minutes, designed for fast social media consumption. The short-form documentary format gives you enough room to build emotional depth without demanding the massive budget of a feature film.
What separates a documentary from a simple video clip is intent. A documentary has a story arc, a point of view, and deliberate narrative construction. You are not just recording events. You are shaping raw reality into something meaningful.
Why Make a Short Documentary?
Short documentaries are one of the most accessible ways to start telling real stories. You can produce one with a smartphone, a cheap lapel mic, and free editing software. That low barrier to entry means you can practice and improve quickly without risking thousands of dollars on each project.
For brands, a mini documentary is a powerful content marketing tool. Instead of a standard ad, a brand documentary shows the human side of your company. Think of a short film about the farmers who grow your coffee beans or the craftspeople behind your product line. Audiences respond to genuine stories far more than they respond to sales pitches.
For students and first-time filmmakers, the short format teaches you every stage of documentary production without overwhelming you. You learn research, interviewing, cinematography, sound, editing, and storytelling all within a manageable scope. Each short film you make builds skills you will carry into bigger projects.
Festival programmers and online audiences also love short-form content. People are more likely to watch a 7-minute documentary on YouTube than commit to a 2-hour film from an unknown creator. The short format respects your audience’s time while still delivering real emotional impact.
How Long Should a Short Documentary Be?
There is no single correct length, but here are practical guidelines based on how people actually consume short documentaries. For YouTube and online platforms, 5 to 15 minutes is the sweet spot. Anything under 5 minutes works well for social media and branded content. Festival submissions typically run 10 to 40 minutes, depending on the category.
For a school project or your first film, aim for 3 to 8 minutes. That range forces you to be disciplined about story. You cannot include every interesting detail, so you learn to prioritize what moves the narrative forward. A tight 5-minute film almost always beats a rambling 20-minute one.
The real test is whether every scene earns its place. If a viewer could skip a section without losing the story, cut that section. Length should be determined by the story, not by a target number.
Essential Equipment for Documentary Filmmaking
You do not need expensive gear to start, but you do need the right basics. Filmmakers in online communities constantly say the same thing: audio matters more than video. People will forgive slightly soft footage. They will not forgive bad sound. Here is what you need at each level.
Camera Options (From Smartphones to Cinema Cameras)
Your phone is a perfectly valid starting camera. Modern smartphones shoot 4K video with good built-in stabilization. If you want to step up, an entry-level mirrorless camera like a Sony ZV-E10 or Canon EOS R50 gives you interchangeable lenses and better low-light performance. For documentary work, prioritize a camera with good autofocus and clean HDMI output if you plan to stream or monitor externally.
Whatever camera you use, learn its manual settings. Understand frame rate (24fps for a cinematic look, 60fps for smooth motion), ISO, aperture, and shutter speed. These fundamentals matter far more than the brand of camera body you own.
Audio Gear (The Most Important Investment)
If you buy only one piece of equipment, make it a decent microphone. For interviews, a wireless lapel mic system or a shotgun mic placed close to your subject will transform your production quality. The Rode Wireless GO series and similar wireless kits are popular among solo documentary filmmakers because they are easy to set up and reliable.
Always monitor your audio with headphones while recording. I cannot count how many times checking my headphones saved an interview from a buzzing interference sound or a mic that had slipped out of position. Record a quick audio test before every interview session.
Lighting and Accessories
Natural light is your friend for documentary work. Position subjects facing a window for soft, flattering light. For controlled setups, a single LED panel with a diffuser handles most interview situations. A basic tripod, extra batteries, and memory cards round out your kit. For run-and-gun shooting, a gimbal stabilizer helps but is not essential for your first film.
Here is a quick equipment checklist for beginners:
Camera (smartphone, mirrorless, or DSLR)
External microphone (wireless lav or shotgun)
Headphones for audio monitoring
Tripod or stabilizer
Portable LED light (optional but helpful)
Spare batteries and memory cards
Lapel mic windscreen for outdoor shoots
How to Make a Short Documentary: Step-by-Step Process
This is the core of documentary filmmaking. Follow these eight steps in order, and you will have a finished short documentary by the end.
Step 1: Choose Your Topic and Define Your Angle
Pick a subject you genuinely care about because you will spend weeks immersed in it. The best short documentaries focus on something specific rather than broad. Instead of “climate change,” tell the story of one farmer adapting to drought. Instead of “immigration,” follow one family’s first month in a new city.
Define your angle in a single sentence. If you cannot summarize what your film is about in one clear sentence, you are not ready to move forward. That sentence becomes your creative north star for every decision that follows.
Step 2: Research and Develop Your Story
Research comes before filming, not during. Read articles, watch existing films on your topic, and talk to people informally before you ever roll camera. This research phase helps you identify the most compelling characters, the key conflicts, and the emotional beats your documentary needs.
Look for a story arc. Documentaries work best when they have a beginning, middle, and end. Ask yourself: What is the central question or tension? What is at stake? How does the situation change or resolve? One filmmaker on a documentary forum put it perfectly: do not start filming until the story is clear.
Step 3: Write a Documentary Treatment or Script
A treatment is a 1 to 3 page document that describes your documentary from start to finish. It includes your working title, logline, a summary of the story, descriptions of key characters, and the visual style you plan to use. Think of it as a blueprint that keeps you focused during production.
Unlike a fiction script, a documentary treatment is a plan, not a binding document. Real life will surprise you, and you should adapt. But having that initial roadmap prevents you from coming home with hours of footage and no idea how to shape it into a story.
For interview-based documentaries, write a list of questions rather than a word-for-word script. Group questions thematically and order them to build rapport, starting with easy background questions before moving into deeper emotional territory.
Step 4: Plan Your Shoot (Pre-Production)
Pre-production is where amateur films succeed or fail. Create a shot list of the interviews and B-roll you need. Scout your locations ahead of time, checking for light, background noise, and potential interruptions. Schedule your shoots with buffer time because interviews always run longer than expected.
Prepare release forms for everyone who appears on camera. Having unsigned consent forms is one of the most common headaches filmmakers report. Get signed releases on the day of filming, before you start recording. A simple one-page talent release form covers most situations.
Confirm your equipment the night before. Charge every battery. Format your memory cards. Pack your bag and do a mental walkthrough of the shoot. This preparation takes 30 minutes and saves hours of stress.
Step 5: Film Interviews and B-Roll
Interviews are the backbone of most short documentaries. Set up your subject in a comfortable location with good light and clean audio. Frame them slightly off-center using the rule of thirds, and position the camera at eye level. Ask your subject to look at you, not the lens, for a more natural conversation.
The best interview advice I have heard from working filmmakers is to play catch with your subjects. Let conversations develop naturally. Do not rush through a list of questions like a robot. If someone gives a short answer, follow up gently. Sometimes the most powerful moments come from a simple follow-up question asked in a quiet, patient tone.
Tell subjects why their story matters to you, but avoid revealing your full angle. This keeps their responses authentic rather than scripted. Let them tell their own story in their own words.
After interviews, capture B-roll. B-roll is the supplemental footage that plays over interview audio to illustrate the story. Film your subject at work, in their environment, performing daily tasks. Shoot environmental shots of the location, close-up details, and wide establishing shots. You can never have too much B-roll when you reach the editing room.
Step 6: Log and Organize Your Footage
Before you start editing, watch all your footage and log it. Create a spreadsheet or document noting the best soundbites from each interview, with timecodes. Mark which B-roll clips correspond to which story points. This step feels tedious but it saves enormous time later.
Organize your files into clear folders: interviews, B-roll, archival footage, music, and graphics. Name your files descriptively, not with default camera names like “C0001.mp4.” A little organization here prevents the nightmare of searching through hundreds of unnamed clips during the edit.
Step 7: Edit Your Documentary
Editing is where your documentary actually becomes a film. Start by building a paper edit, a text version of your story assembled from your best interview quotes. Arrange these quotes in an order that tells a compelling narrative. This gives you a structure before you touch a single clip on the timeline.
Next, build a rough cut. Drop your selected interview clips onto the timeline in order, then layer B-roll over the parts where you do not need to see the speaker’s face. Use the A-roll (your primary interview footage) to carry the story and B-roll to add visual context.
Pacing is everything. One experienced short-form filmmaker advises against slow-rolling exposition. Get into the story quickly. Open with something that hooks the viewer in the first 10 seconds. Then maintain momentum throughout, building speed and intensity as the story develops.
Cut aggressively in your rough cut. It is easier to add material back than to remove it later. Most first-time editors keep too much footage. If a clip does not advance the story, remove it without sentiment.
Step 8: Add Sound Design, Music, and Color
Sound design and music are storytelling tools that many beginners underestimate. Music sets emotional tone. Silence creates tension. A well-placed moment of quiet can be more powerful than any score. Choose music that supports the emotion without overwhelming the interviews.
For color, apply basic color correction first to balance exposure and white temperature across all your clips. Then add color grading to give your film a consistent visual mood. You do not need expensive software for this. Free tools like DaVinci Resolve offer professional-level color grading capabilities.
Add subtitles for accessibility. Many viewers watch documentaries on phones without sound, so captions ensure your story reaches everyone. Subtitles also help if your subjects have strong accents or speak in a second language.
How to Film a Documentary by Yourself (One-Person Crew Techniques)
Many beginners film alone, and that is completely fine. Some of the most intimate documentaries are shot by a single person who handles camera, audio, and interviewing simultaneously. The key is simplification and preparation.
Use a fixed camera setup for interviews. Mount your camera on a tripod, frame the shot, and lock it down. Then sit next to the camera holding your microphone or audio recorder. This lets you maintain eye contact with your subject while capturing stable footage and clean audio. You become both operator and conversation partner.
For B-roll, embrace handheld shooting. A smartphone with stabilization or a mirrorless camera with in-body stabilization works well for solo run-and-gun footage. Move slowly and deliberately. Use a monopod if you need extra stability without the weight of a full tripod.
Automate what you can. Set your camera to auto-exposure or aperture priority mode if you are moving between locations quickly. Use a wireless mic system that records to its own receiver so you do not have to cable your subject. Every setup choice you make should reduce the number of things you juggle simultaneously.
Most importantly, be honest with your subjects. Tell them you are a one-person crew and ask for patience. People are generally generous when they understand you are passionate about their story and working independently. That honesty often makes them more comfortable, not less.
Smartphone Filmmaking Tips for Documentaries
Your smartphone is a serious documentary tool if you use it right. Start with good audio because no phone has a built-in mic good enough for interviews. Plug in a wireless lapel mic or a shotgun mic adapter. This single upgrade separates professional-sounding smartphone documentaries from amateur ones.
Lock your focus and exposure. Tap and hold on your subject to lock focus, then adjust exposure manually. Auto-exposure shifts during an interview are distracting and look unprofessional. If your phone supports a film or log mode, turn it on for more flexibility in color grading.
Shoot horizontally even if your final output is for vertical platforms. You can always crop a horizontal shot to vertical, but you cannot add width to a vertical shot later. Film in the highest resolution your phone supports, ideally 4K, so you have room to crop and reframe in post.
Invest in a small smartphone gimbal for smooth B-roll shots. A basic stabilizer eliminates the shake that immediately signals amateur footage. Pair it with a clip-on wide-angle lens for more cinematic establishing shots when space allows.
Free and affordable apps like Filmic Pro or Blackmagic Cam give you manual control over your phone camera that the default app does not offer. These tools turn your phone into a device with settings comparable to a traditional camera.
Copyright and Legal Considerations
This is an area where most documentary guides stay silent, but it matters. Understanding basic legal considerations protects your film from being taken down, rejected by festivals, or hit with copyright claims.
First, always get signed release forms from anyone who appears in your documentary. This includes interview subjects, but also bystanders who are recognizable in B-roll. A talent release form grants you permission to use their image and words. Without it, anyone can ask you to remove them from your film.
Second, be careful with music. You cannot use copyrighted songs without licensing them. Use royalty-free music libraries like Artlist, Epidemic Sound, or YouTube’s free audio library. If you want to use a popular song, you need to secure sync rights, which can be expensive and time-consuming. Original music composed for your film avoids this problem entirely.
Third, if you use archival footage or photos, confirm you have the rights or that the material is in the public domain. Many historical photos and newsreels are available through public domain archives, government websites, and Creative Commons-licensed sources. Always credit the source even when not legally required.
Fourth, if your documentary includes footage of recognizable private property, especially interiors, get a location release from the owner. Public spaces generally do not require releases, but private businesses and homes do.
Common Mistakes to Avoid
Avoiding mistakes is just as important as following best practices. Here are the most common pitfalls that trip up first-time documentary filmmakers, based on real-world feedback from filmmaking communities.
Skipping the research phase. Many beginners grab a camera and start shooting before they understand their subject. Without research, you come home with footage but no story. Research first, always.
Neglecting audio quality. Bad audio ruins otherwise great footage. Invest in a real microphone, monitor with headphones, and record in the quietest environment possible. This is the single biggest technical difference between amateur and professional documentaries.
Filming without a shot list or plan. A shot list keeps you focused and ensures you capture everything you need. Without one, you will miss critical B-roll and have to schedule expensive reshoots.
Trying to cover too much ground. A short documentary needs a narrow focus. If you try to tell every angle of a big topic in 10 minutes, you end up with a shallow overview. Depth beats breadth every time.
Overusing music and effects. Music should support your story, not dominate it. Too many effects and transitions distract viewers. Let your interviews and footage carry the emotional weight, and use music sparingly to enhance key moments.
Ignoring the ending. One experienced short-form filmmaker emphasizes always keeping your ending in mind. Know where your story lands before you start editing. A strong, deliberate ending leaves a lasting impression. A weak ending undermines everything that came before it.
Distribution: Where to Share Your Short Documentary
Once your film is finished, it is time to share it. YouTube remains the most accessible platform for short documentaries. Create a compelling thumbnail, write a detailed description with keywords, and add chapters so viewers can navigate your film. Many documentary creators build entire channels around short-form content.
Vimeo is favored by professional filmmakers for its higher video quality and cleaner player. It is also where many festival programmers and industry professionals discover new work. A Vimeo account costs a few dollars per month but signals a more serious approach.
For social media, cut a 60-second teaser from your full documentary. Post it on Instagram Reels, TikTok, and YouTube Shorts with a link to the full version. Short clips drive traffic to your main film and help new audiences discover your work.
Film festivals are worth exploring if you want industry recognition. Research festivals that specifically program short documentaries. Local and regional festivals are often more accessible for first-time filmmakers than major international ones. Many festivals now accept submissions through platforms like FilmFreeway.
If your documentary is for a brand or organization, consider hosting it on your website rather than YouTube. A self-hosted player keeps viewers on your site where they can take action, whether that means signing up for a newsletter or learning more about your mission.
FAQs
What is a mini documentary?
A mini documentary is a short non-fiction film, typically 2 to 10 minutes long, that tells a focused story about a single subject, person, or theme. It uses interviews, B-roll footage, and narrative structure to create emotional impact in a compact format.
Can I make a documentary with no experience?
Yes, absolutely. You can make a documentary with no prior experience by starting with a smartphone, an affordable microphone, and free editing software. Begin with a short 3 to 5 minute film about someone you know well. The best way to learn documentary filmmaking is by actually making one, and each project builds your skills.
How long should a short documentary be?
A short documentary typically runs between 2 and 30 minutes. For YouTube and online platforms, 5 to 15 minutes is ideal. For social media and branded content, aim for under 5 minutes. For your first project, keep it between 3 and 8 minutes to stay focused on telling a tight, compelling story.
How to make a documentary for beginners?
Start by choosing a specific topic you care about. Research your subject, write a short treatment, and plan your interviews and B-roll. Film with whatever camera you have, prioritizing good audio. Then edit your footage into a narrative, add music and color, and share it online. Focus on completing a short film rather than perfecting every detail.
What equipment do I need to make a short documentary?
The essential equipment is a camera (smartphone or dedicated camera), an external microphone, headphones for monitoring audio, a tripod, and memory cards. Audio gear is the most important investment because viewers forgive imperfect video but not bad sound. A portable LED light and gimbal are helpful but optional for beginners.
How do I find subjects to interview for a documentary?
Start with people in your own network and community. Local business owners, hobbyists, community leaders, and family members with interesting stories are all strong subjects. Be genuine when you approach people, explain why their story interests you, and build rapport before asking for a formal interview. Most people are flattered when someone wants to document their story.
Final Thoughts on Making Your Short Documentary
Learning how to make a short documentary is a journey that changes how you see the world. You start noticing stories everywhere, in the people around you and the details of daily life that most people walk past. The process teaches you patience, listening, and the art of finding meaning in real human experience.
Do not wait until you have the perfect camera or the most expensive editing software. Start with what you have today. Pick a subject, grab your phone, record a microphone-check, and begin. Your first short documentary will not be perfect, and that is the point. Every filmmaker’s first film is a learning experience that leads to a better second one.
The stories that matter most are the ones only you can tell. Whether it is a family history, a local community issue, or a brand story that connects with customers on a human level, the world needs more genuine documentary storytelling. Take what you have learned here, plan your project, and start filming. Your audience is waiting.